
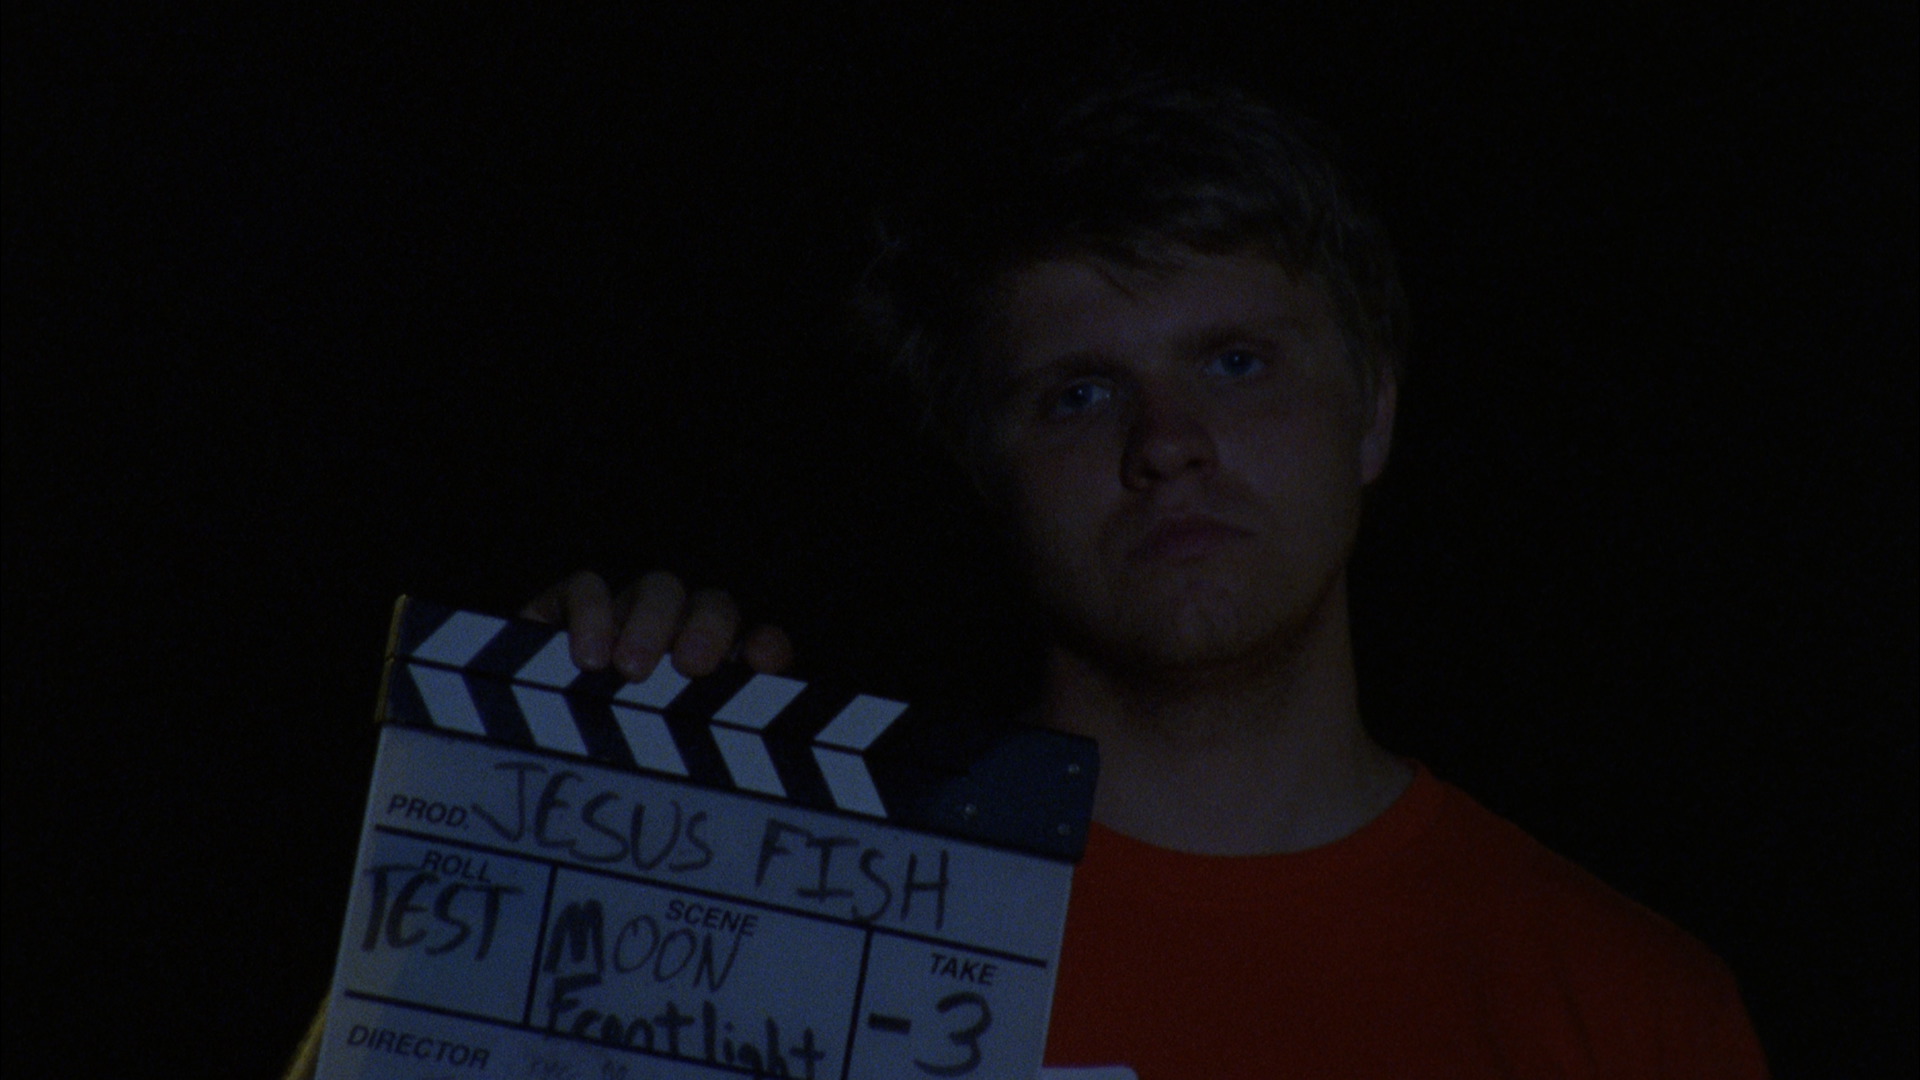
On Set
Moonlight Exposure on “Jesus Fish”
On 04, Oct 2013 | No Comments | In On Set, Tests | By Colton Davie

Jesus Fish is a folkloric tale about a church-swindling con artist, his guilt-ridden brother, and a soul-judging lake monster said to devour sinners. Naturally, the action ends up in the lake during the dark of night.
Night exteriors pose a variety of challenges for the cinematographer, not the least of which being how to get an exposure while maintaining the feeling of darkness.
The Challenge
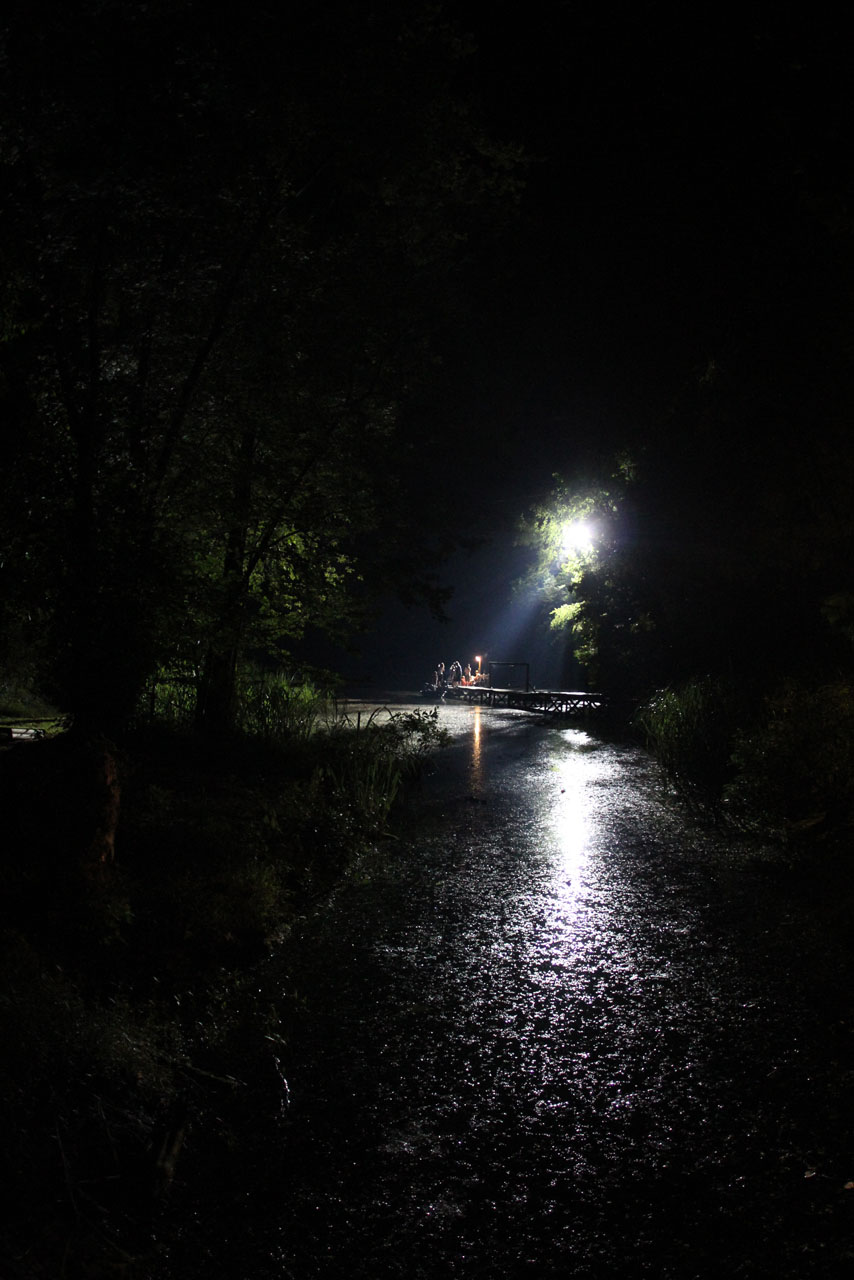
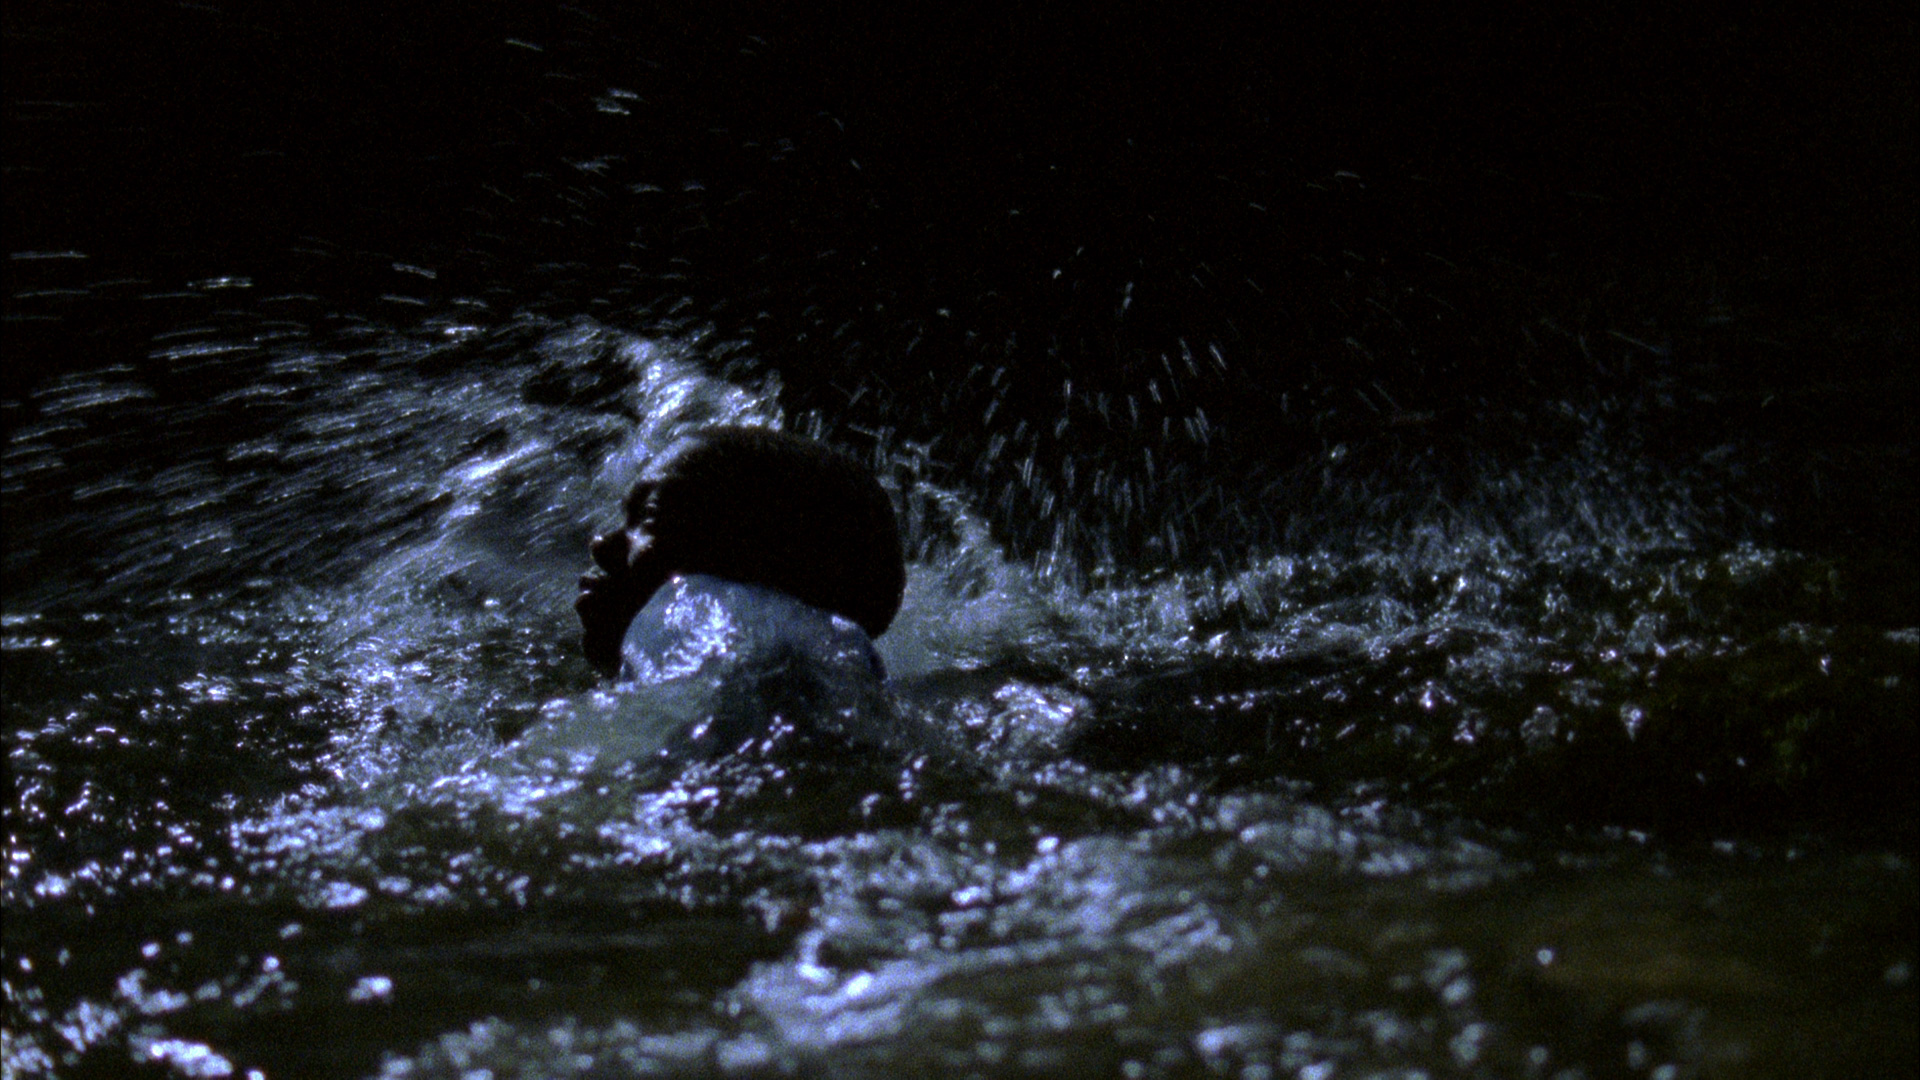
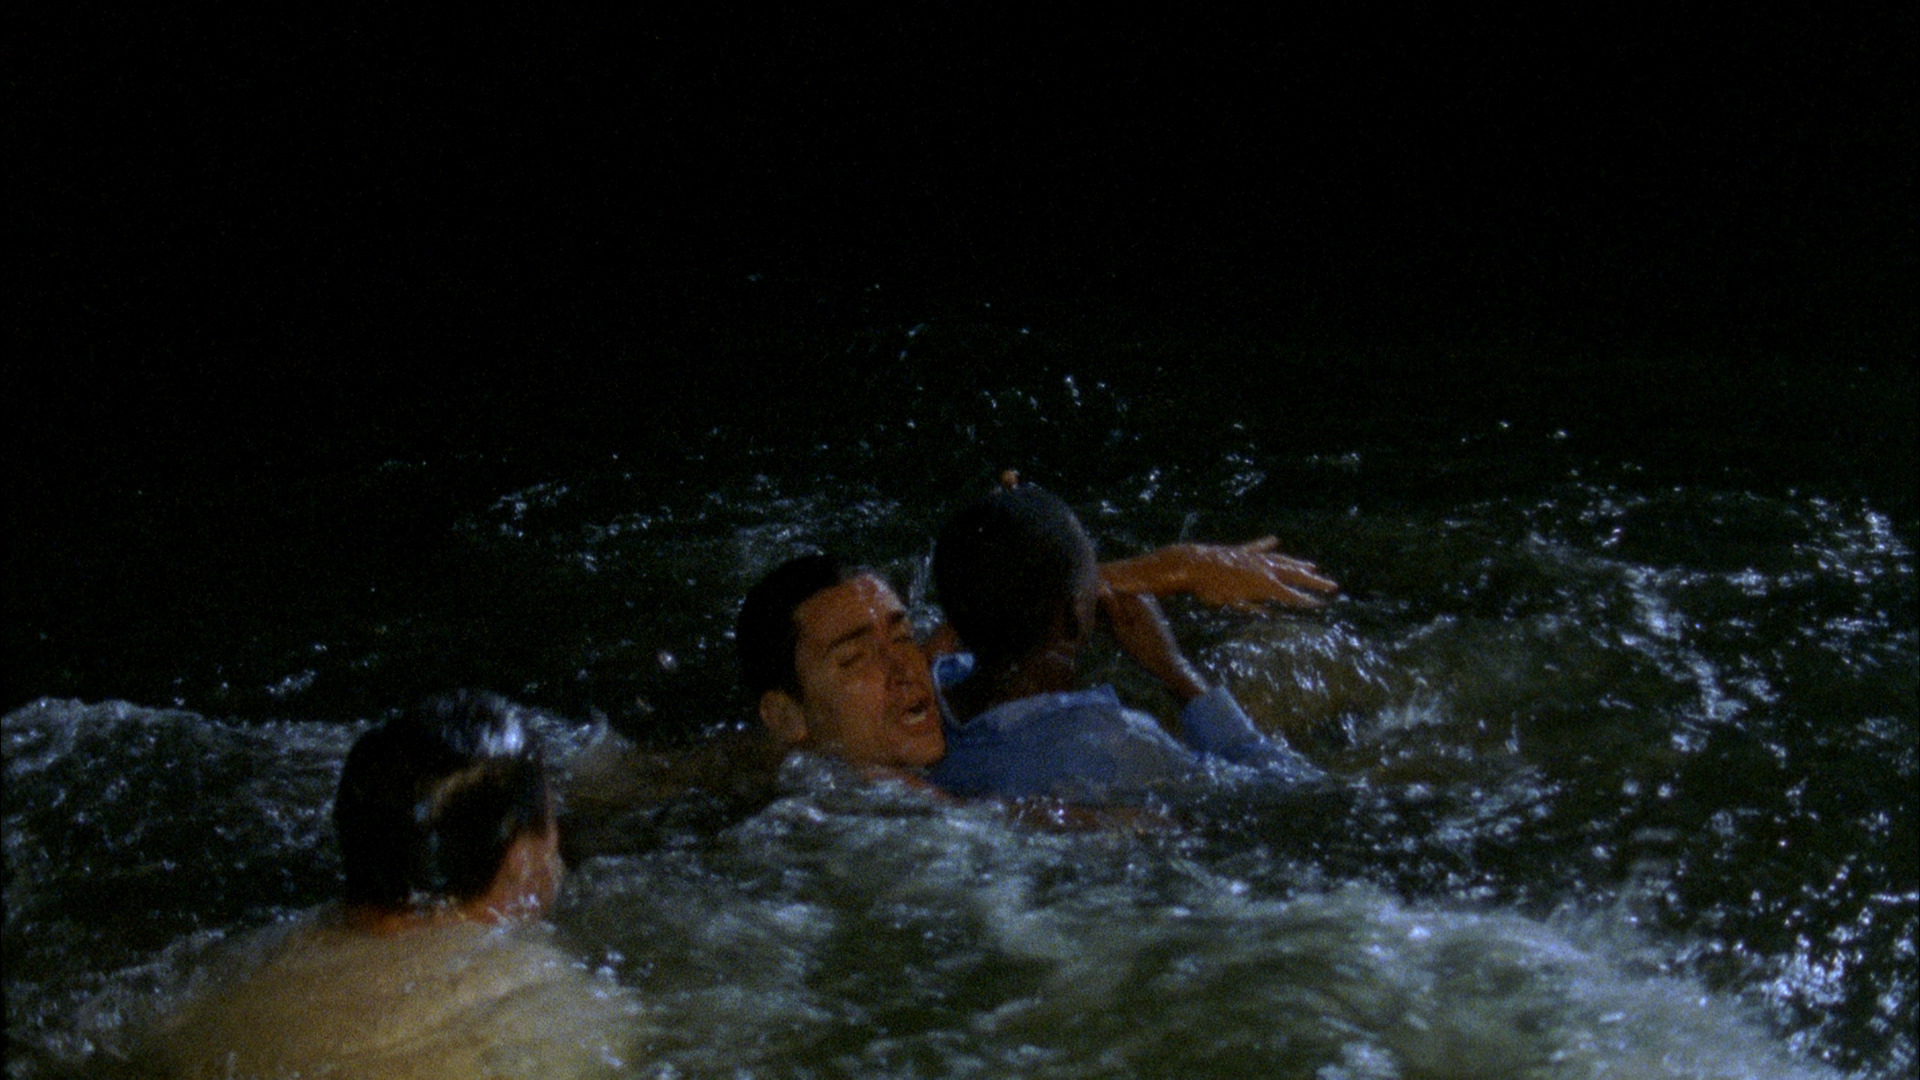
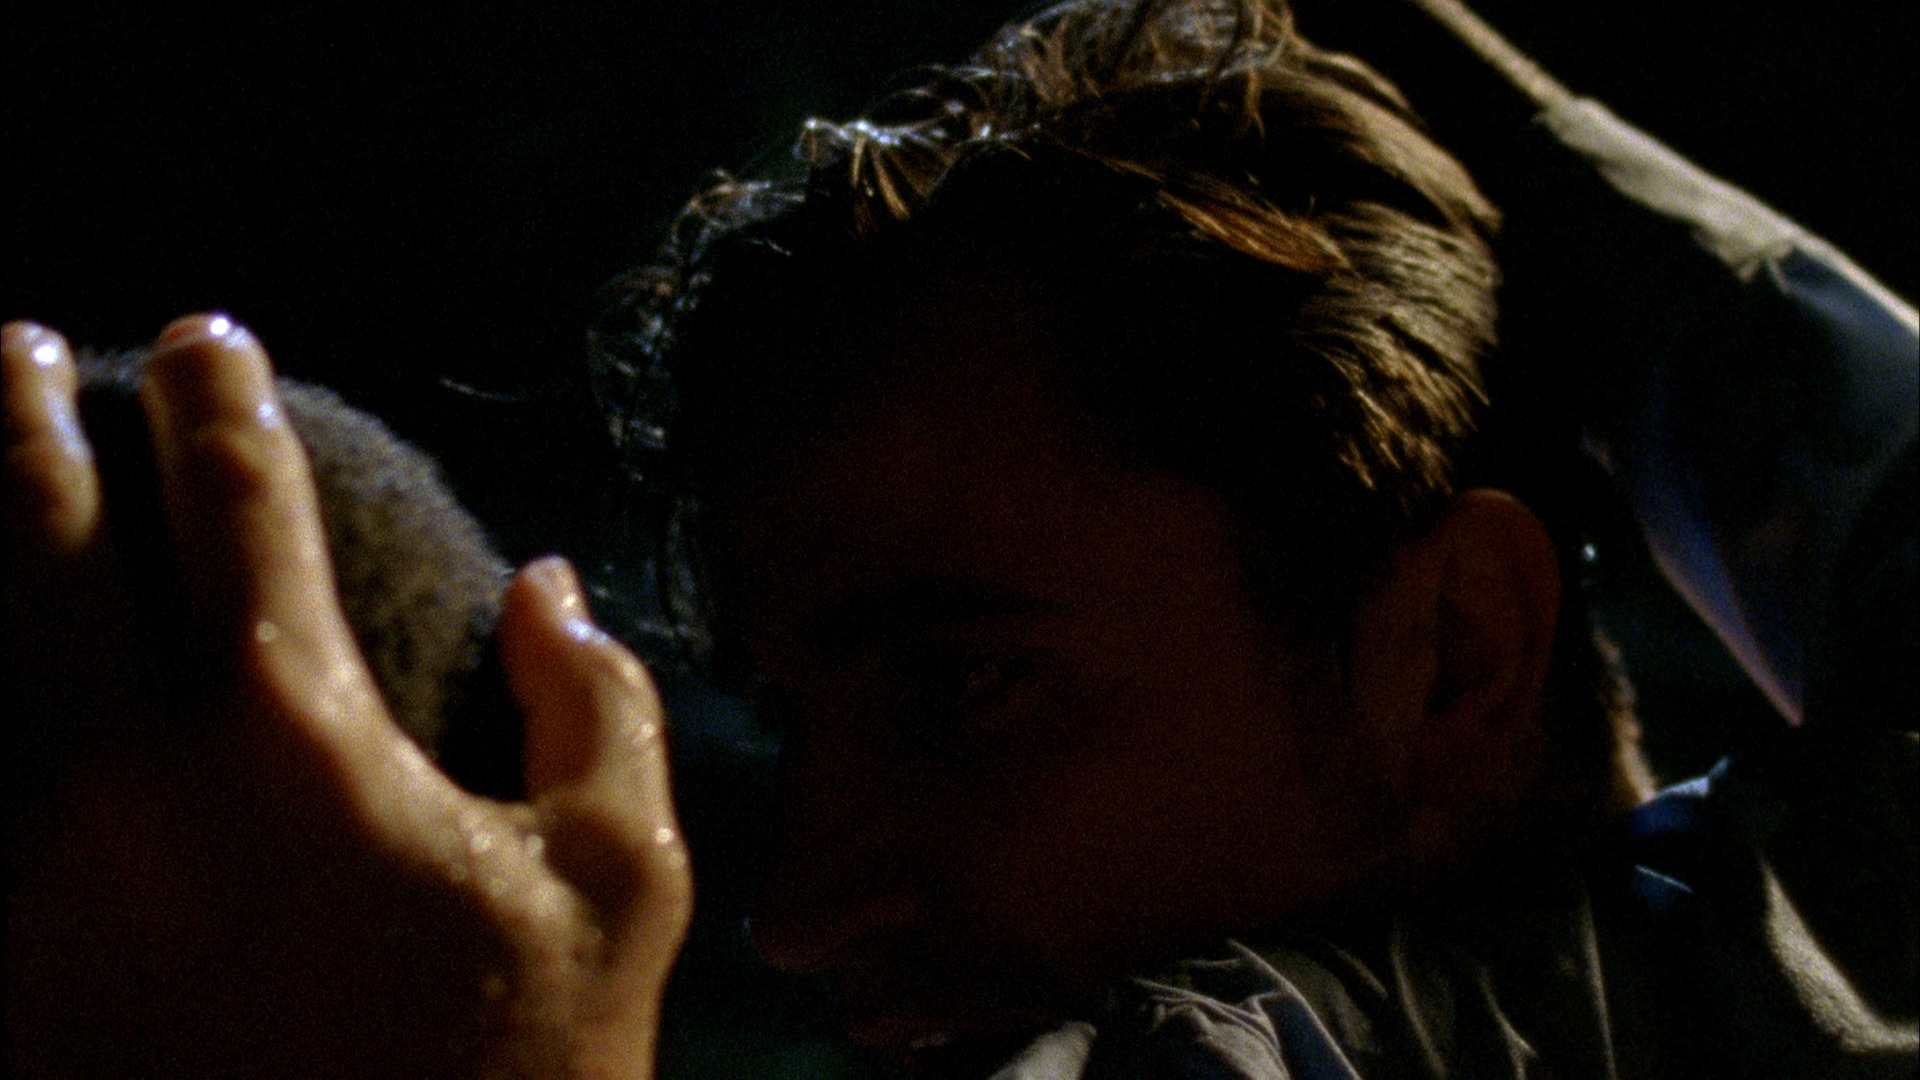
On Jesus Fish, the majority of our night scenes take place on the end of a long dock jutting out into a cove in the Tennessee River. Characters run the length of the dock and swim in the surrounding water. The lighting style of the film and these scenes in particular is dramatic and moody, so I wanted the lighting to allow for strong contrast and deep shadows. At the same time, we had a lot of angles and action to cover in a short amount of time, so I needed to establish a base level of illumination so I could shoot from almost any angle and get an exposure.
In another location with naturally occurring sources, like street lights or store windows, I could base my lighting on those. However, the only existing light on the dock was a couple of small floodlights at the very end. I knew I could use those floodlights to motivate additional light at the end of the dock, but for the rest of the cove I turned to the classic cinematographer’s convention of blue “moonlight.”
I knew I would be shooting Kodak 7219 for the scene which is a 500ASA tungsten-balanced stock. That meant that I could use an HMI source and naturally get a blue-ish light. By not having to use blue gels, which would cut down a significant amount of light output, I could use a relatively smaller fixture but still get enough power to illuminate a large portion of the cove.
The questions was, how big of a light would I need to light the area to the stop I wanted? But before I could answer that question, I needed to know what stop would give me the effect I wanted.
The Test
We planned to shoot with Zeiss 16mm Super Speeds, which open up to T1.3. In order to maintain sharpness, I intended to shoot the night scenes around T2-2.8. With that shooting stop in mind, I had a fixed reference against which I could test different lighting exposures for the moonlight.
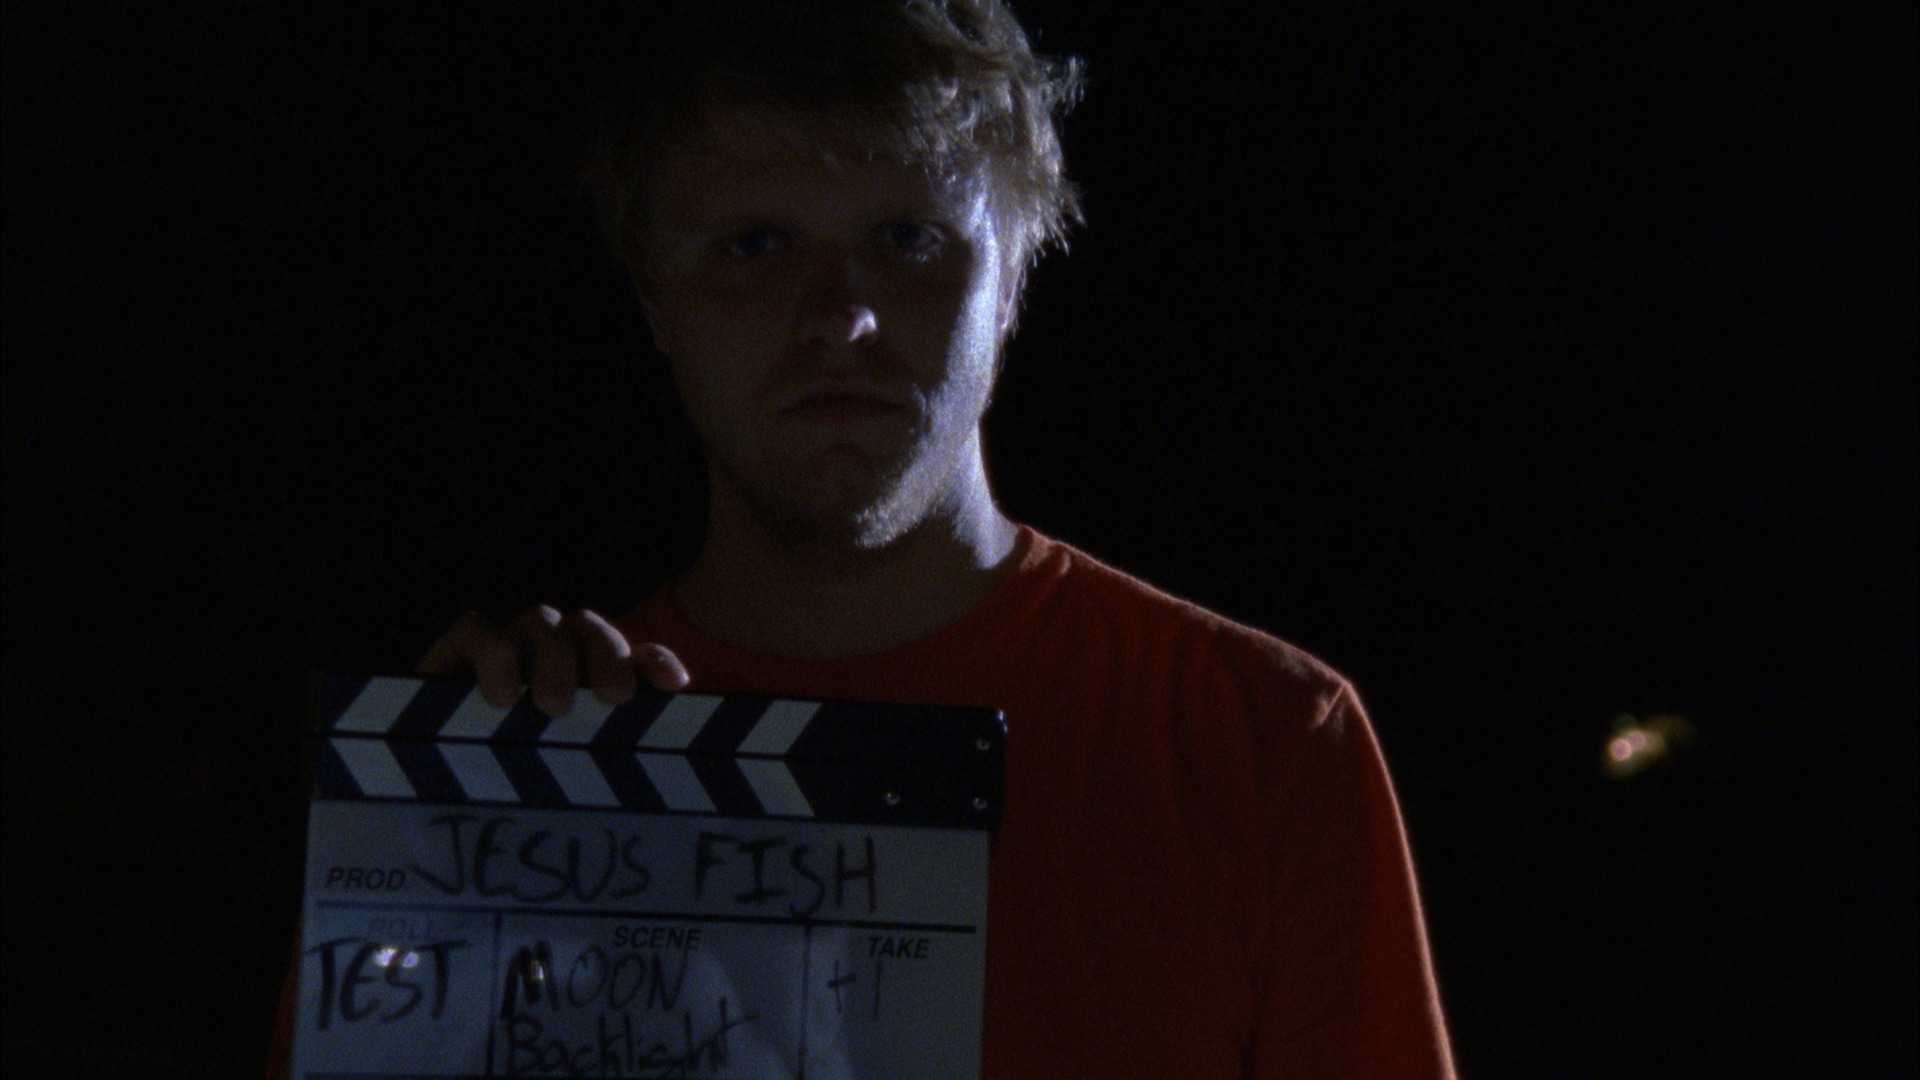
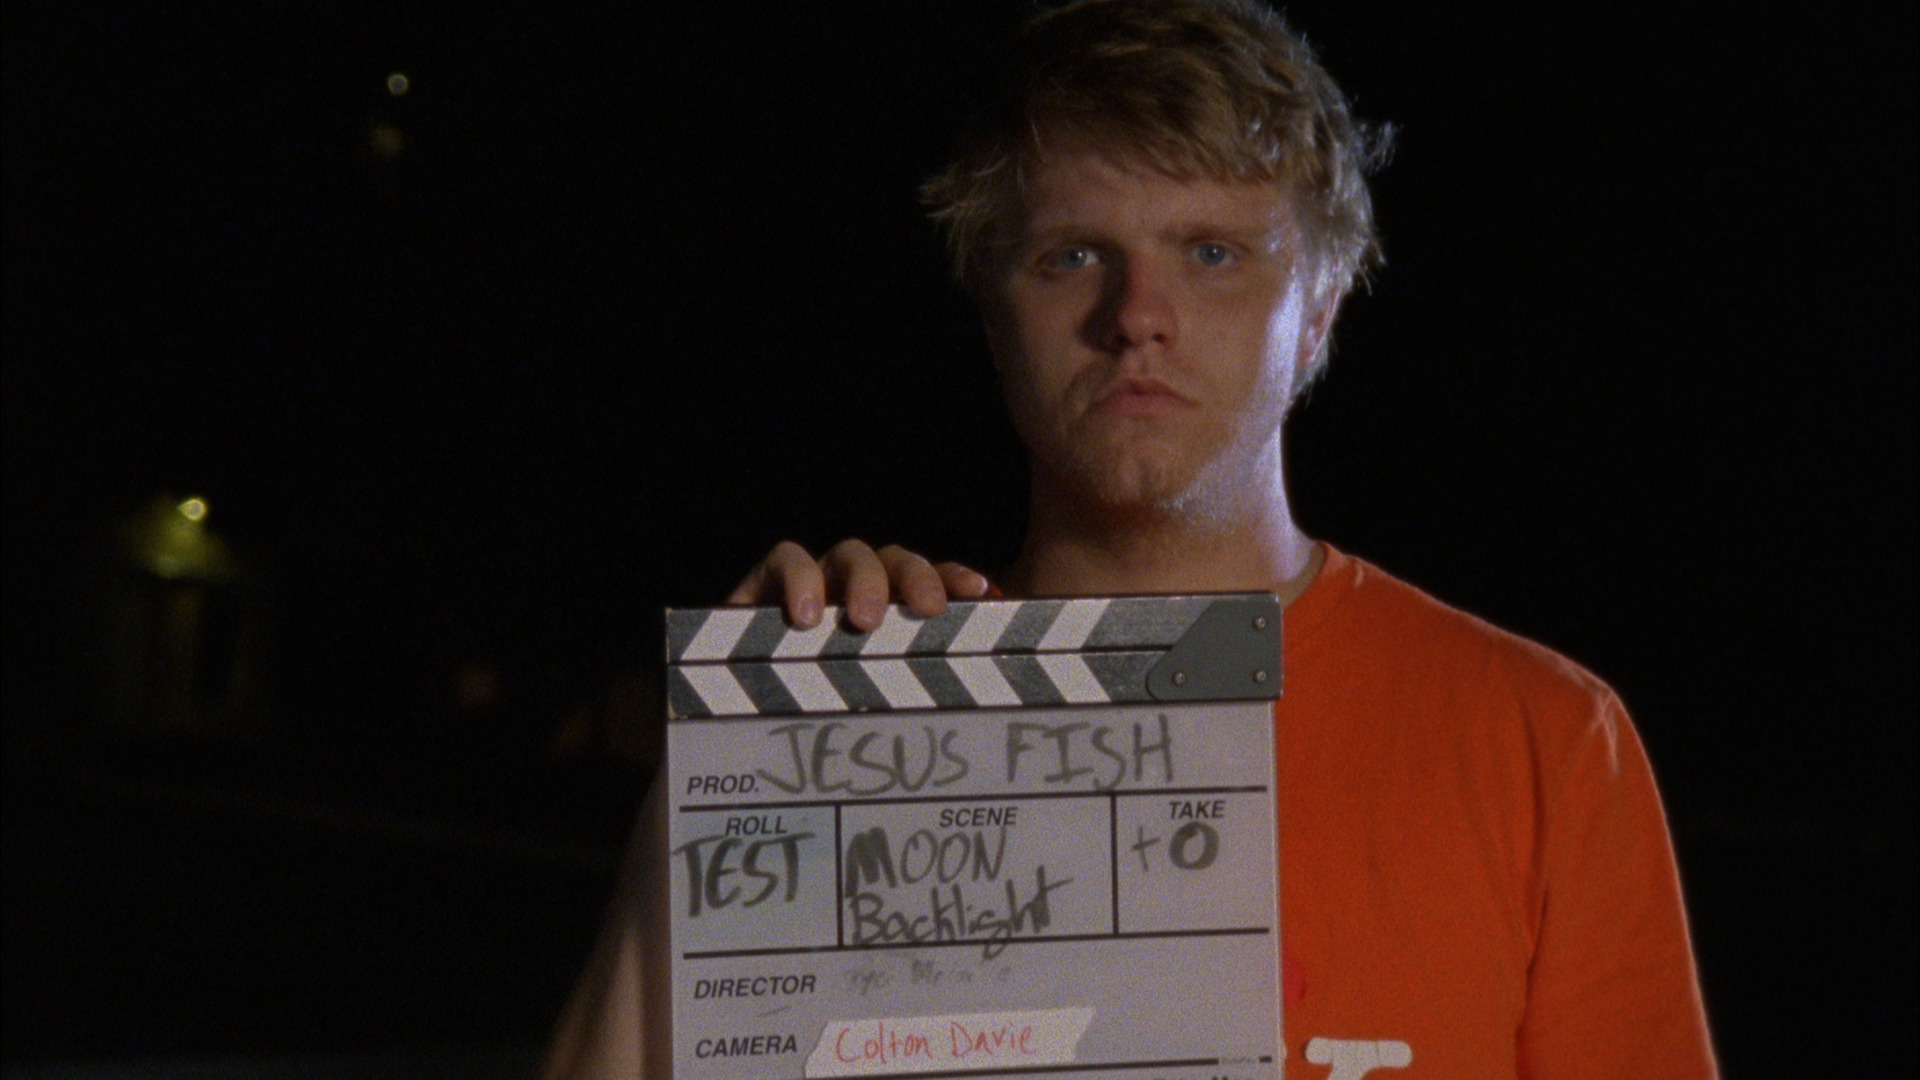
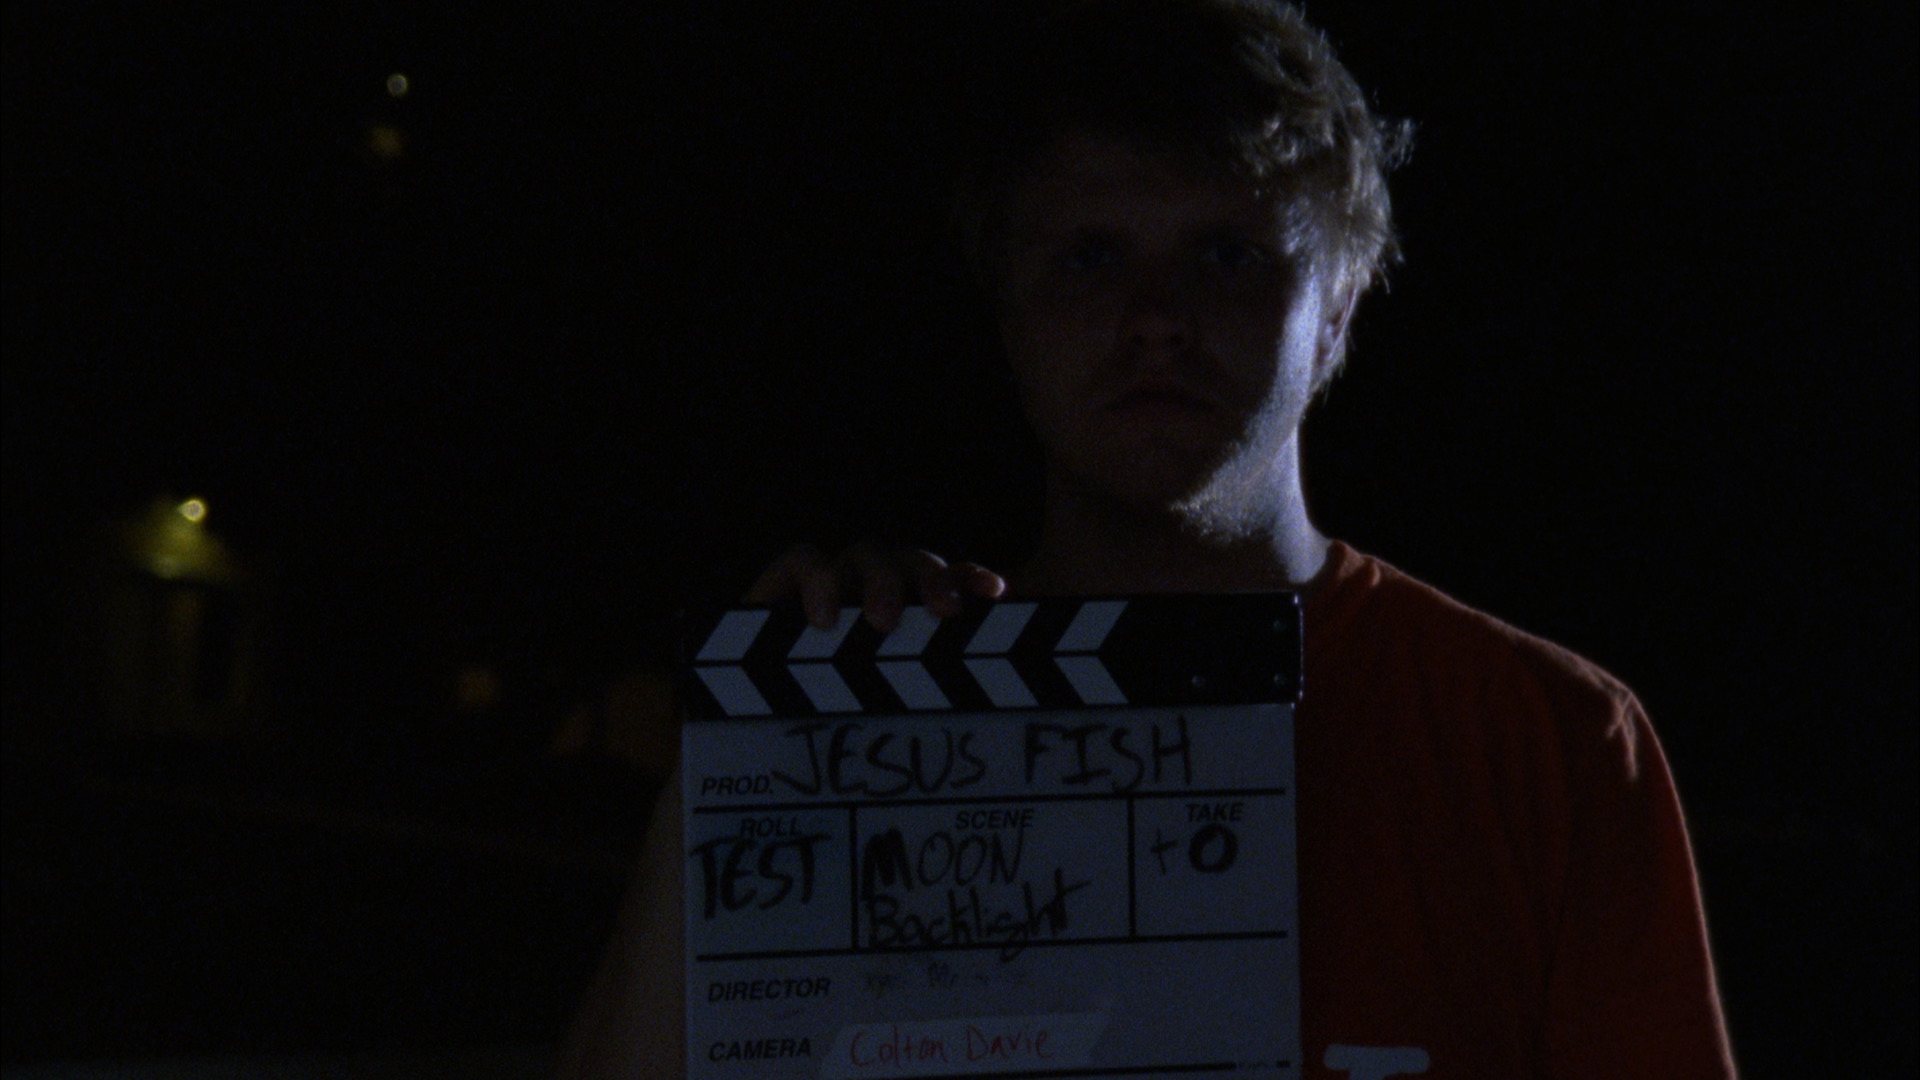
During prep, I took a roll of 7219 and my Canon 8-64mm (which opens to T2.4, right between T2 and T2.8) and shot a series of exposures to see how different “moonlight” brightness levels appeared on film. Using a 1.2K HMI PAR as the “moonlight” source, I varied the exposure by moving the subject (super 1st AD and Animals star, Cameron Lane) closer to or further from the light.
I ran through the test using the “moonlight” once as backlight and once as front light to see how it looked from the different angles that would be required by the scene. For each angle I exposed the light at 1 stop over, at exposure, and 1, 2, and 3 stops under, based on incident meter readings pointed at the light.
The film was processed and transferred at Cinefilm Lab in Atlanta where the rest of the film was later taken care of. I started the roll with a neutrally exposed gray card and asked the telecine operator to set the exposure to the gray card and leave it consistent throughout the test.
Here are stills from the transferred footage:
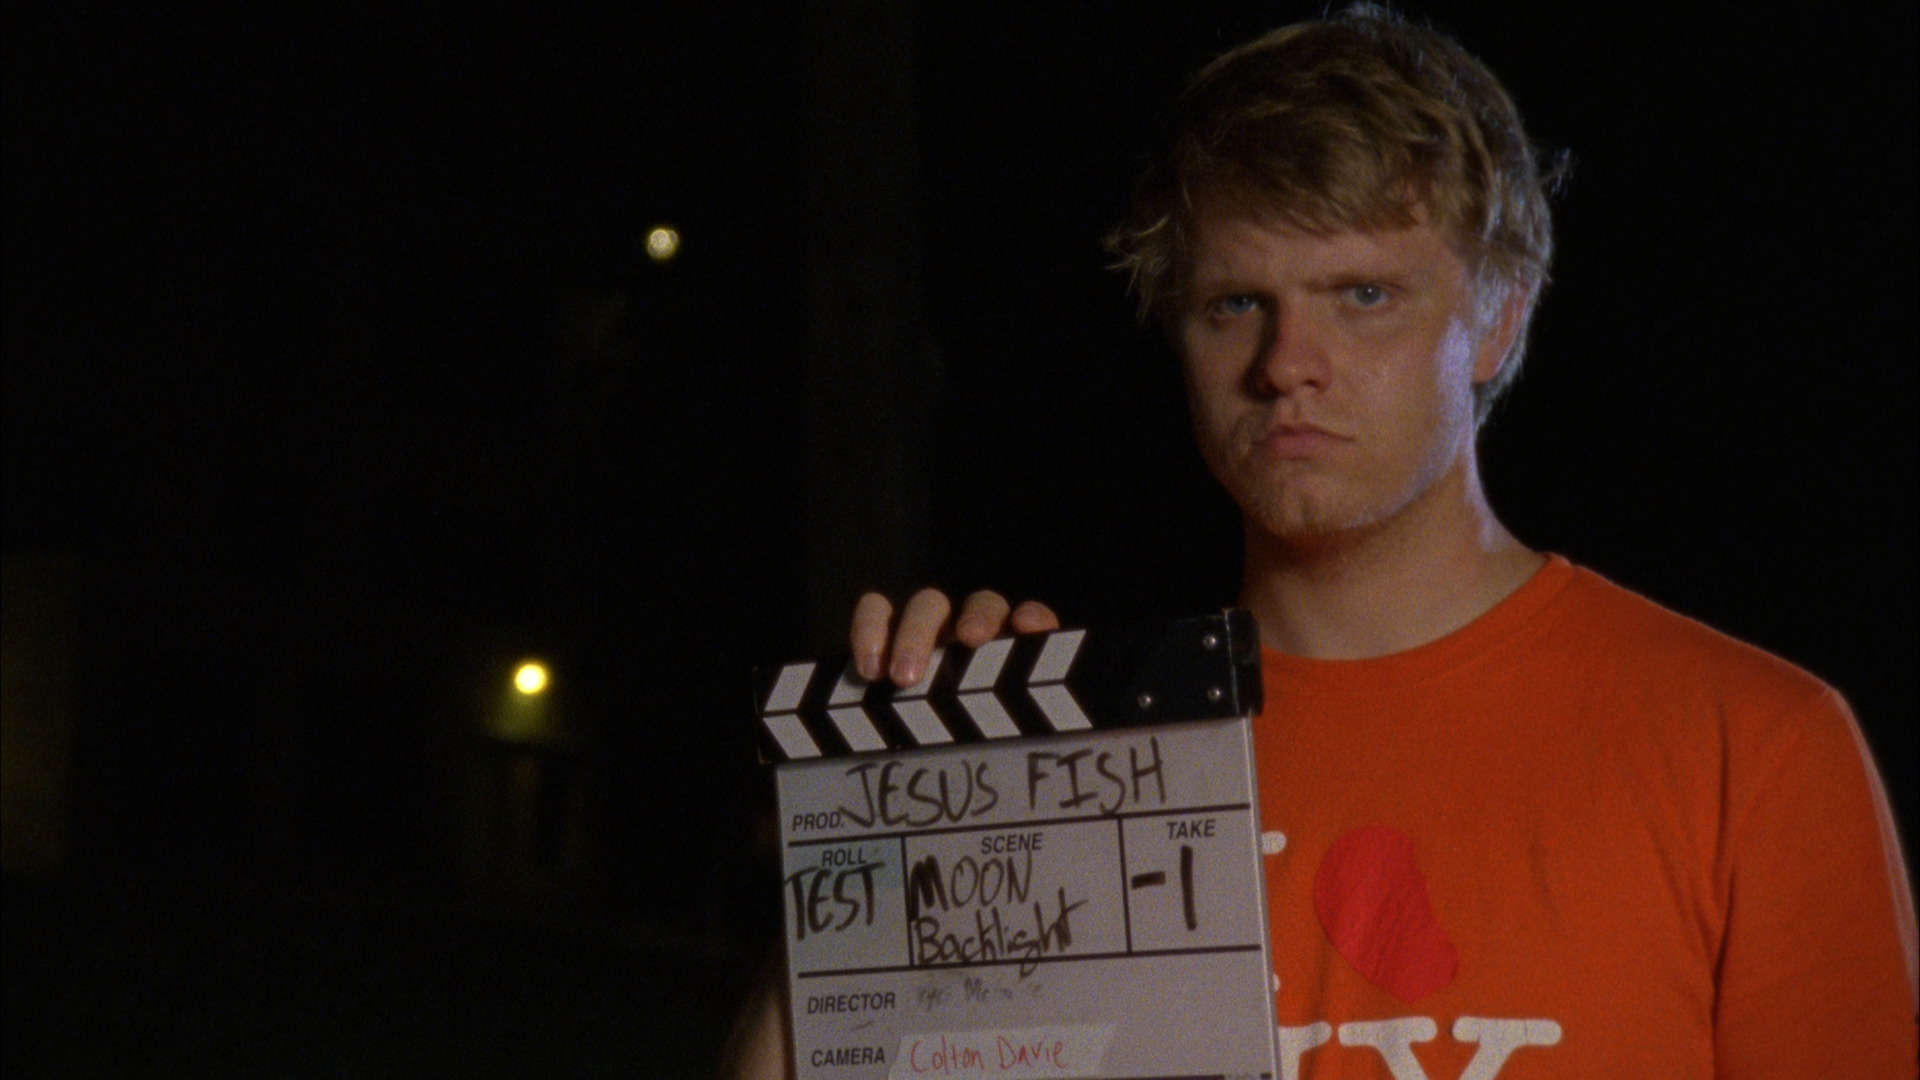
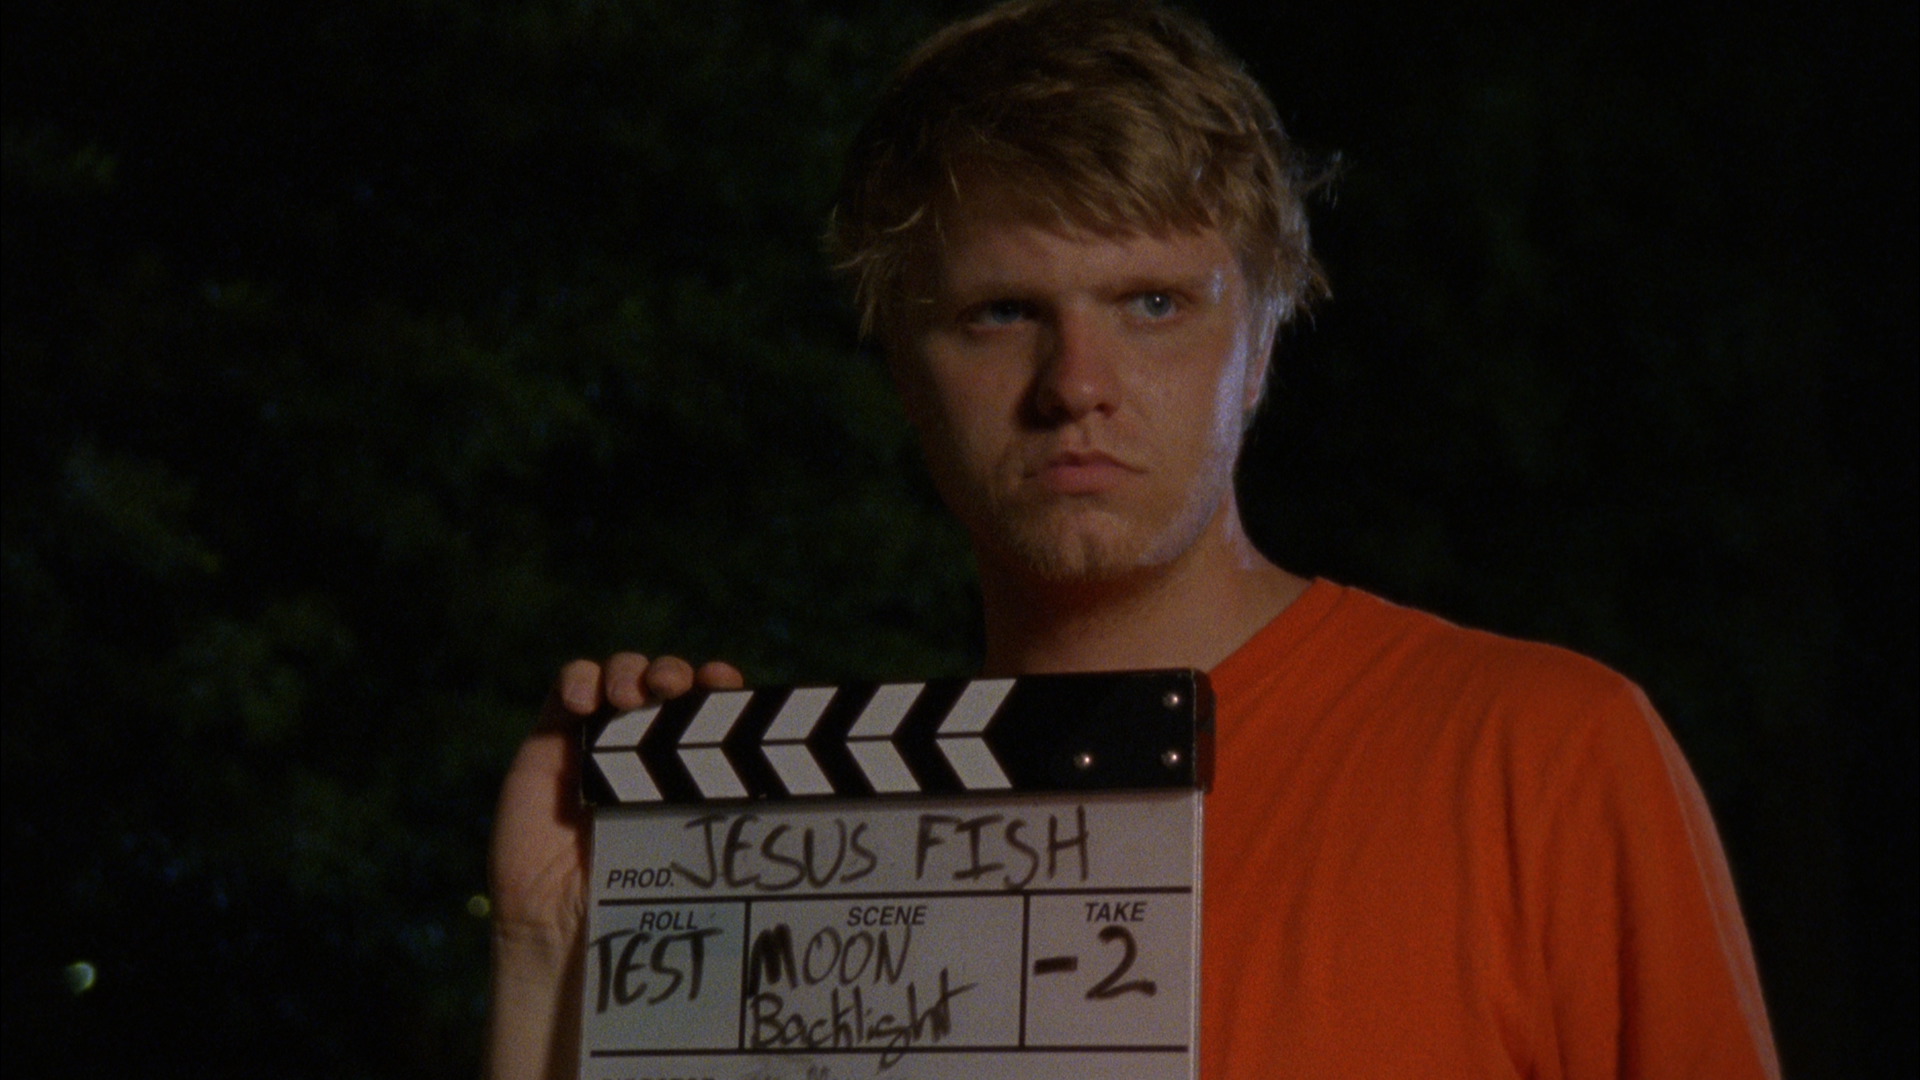
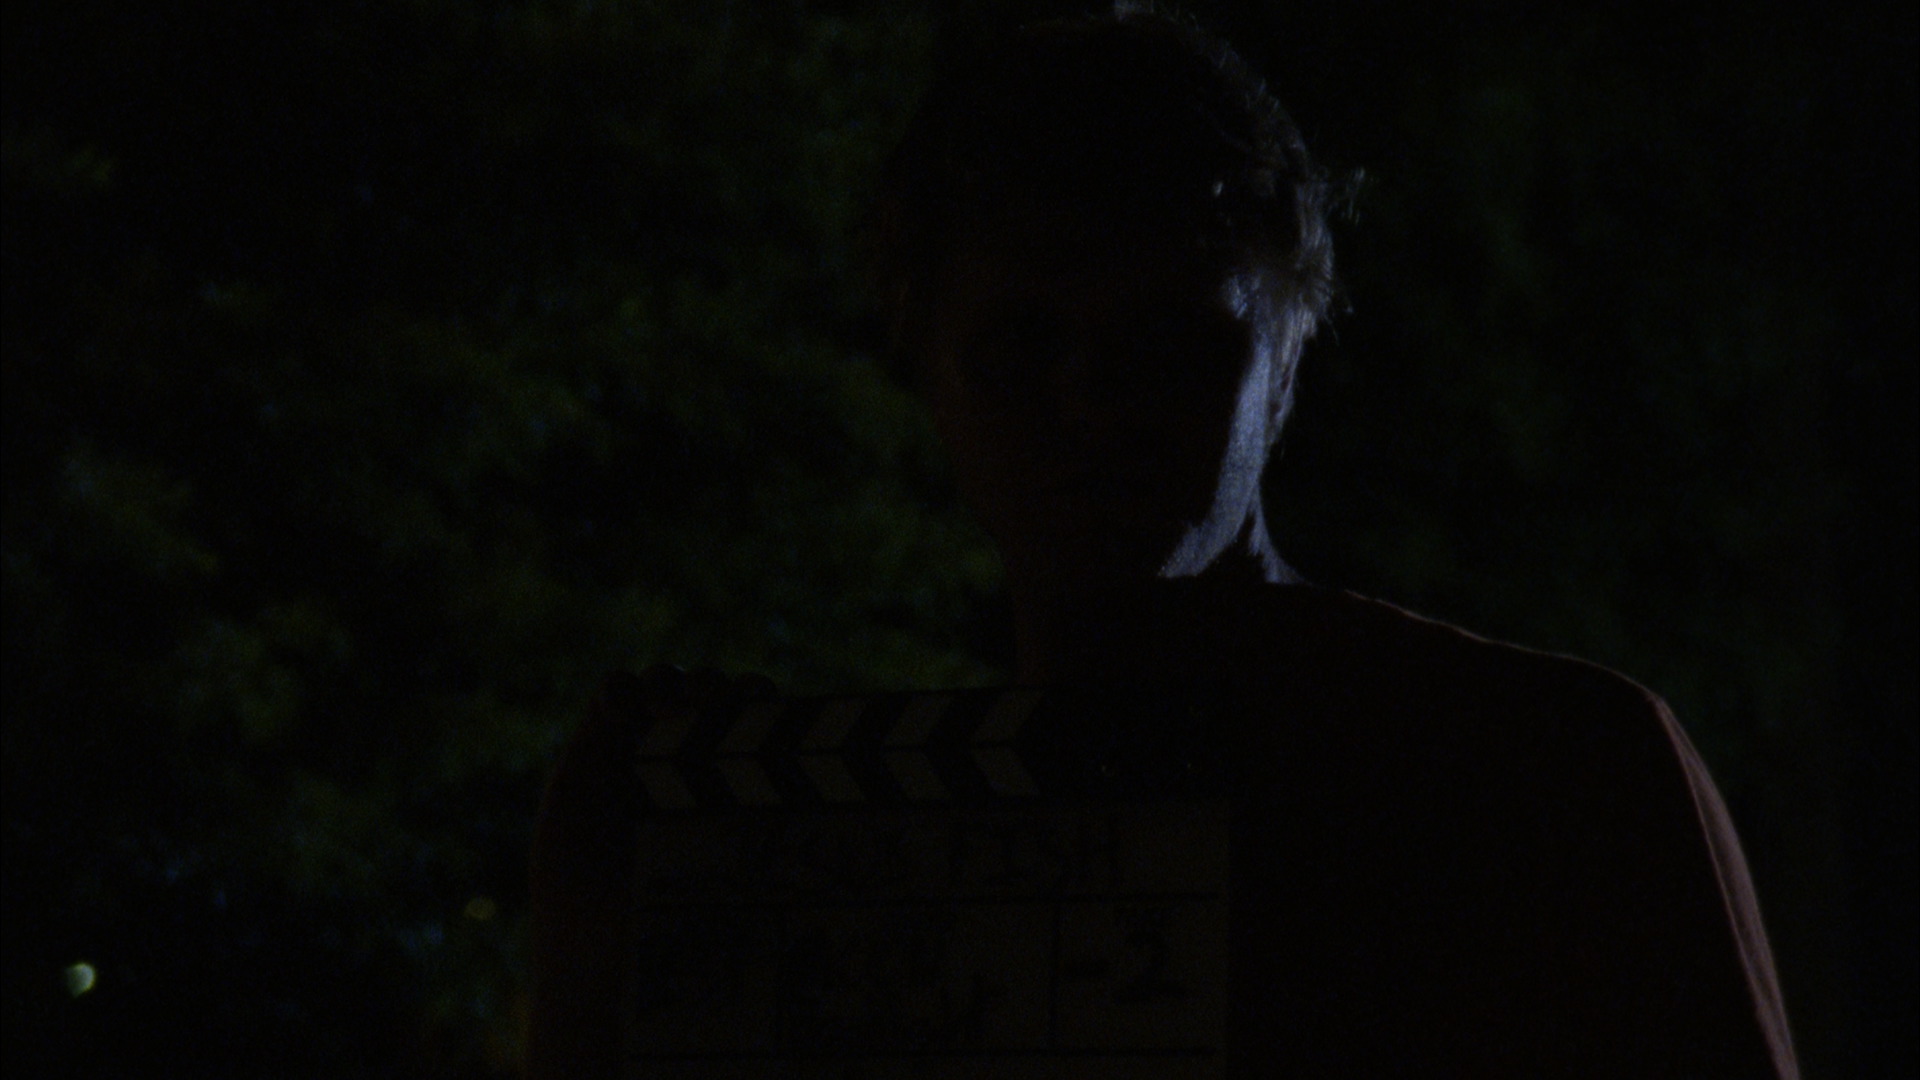
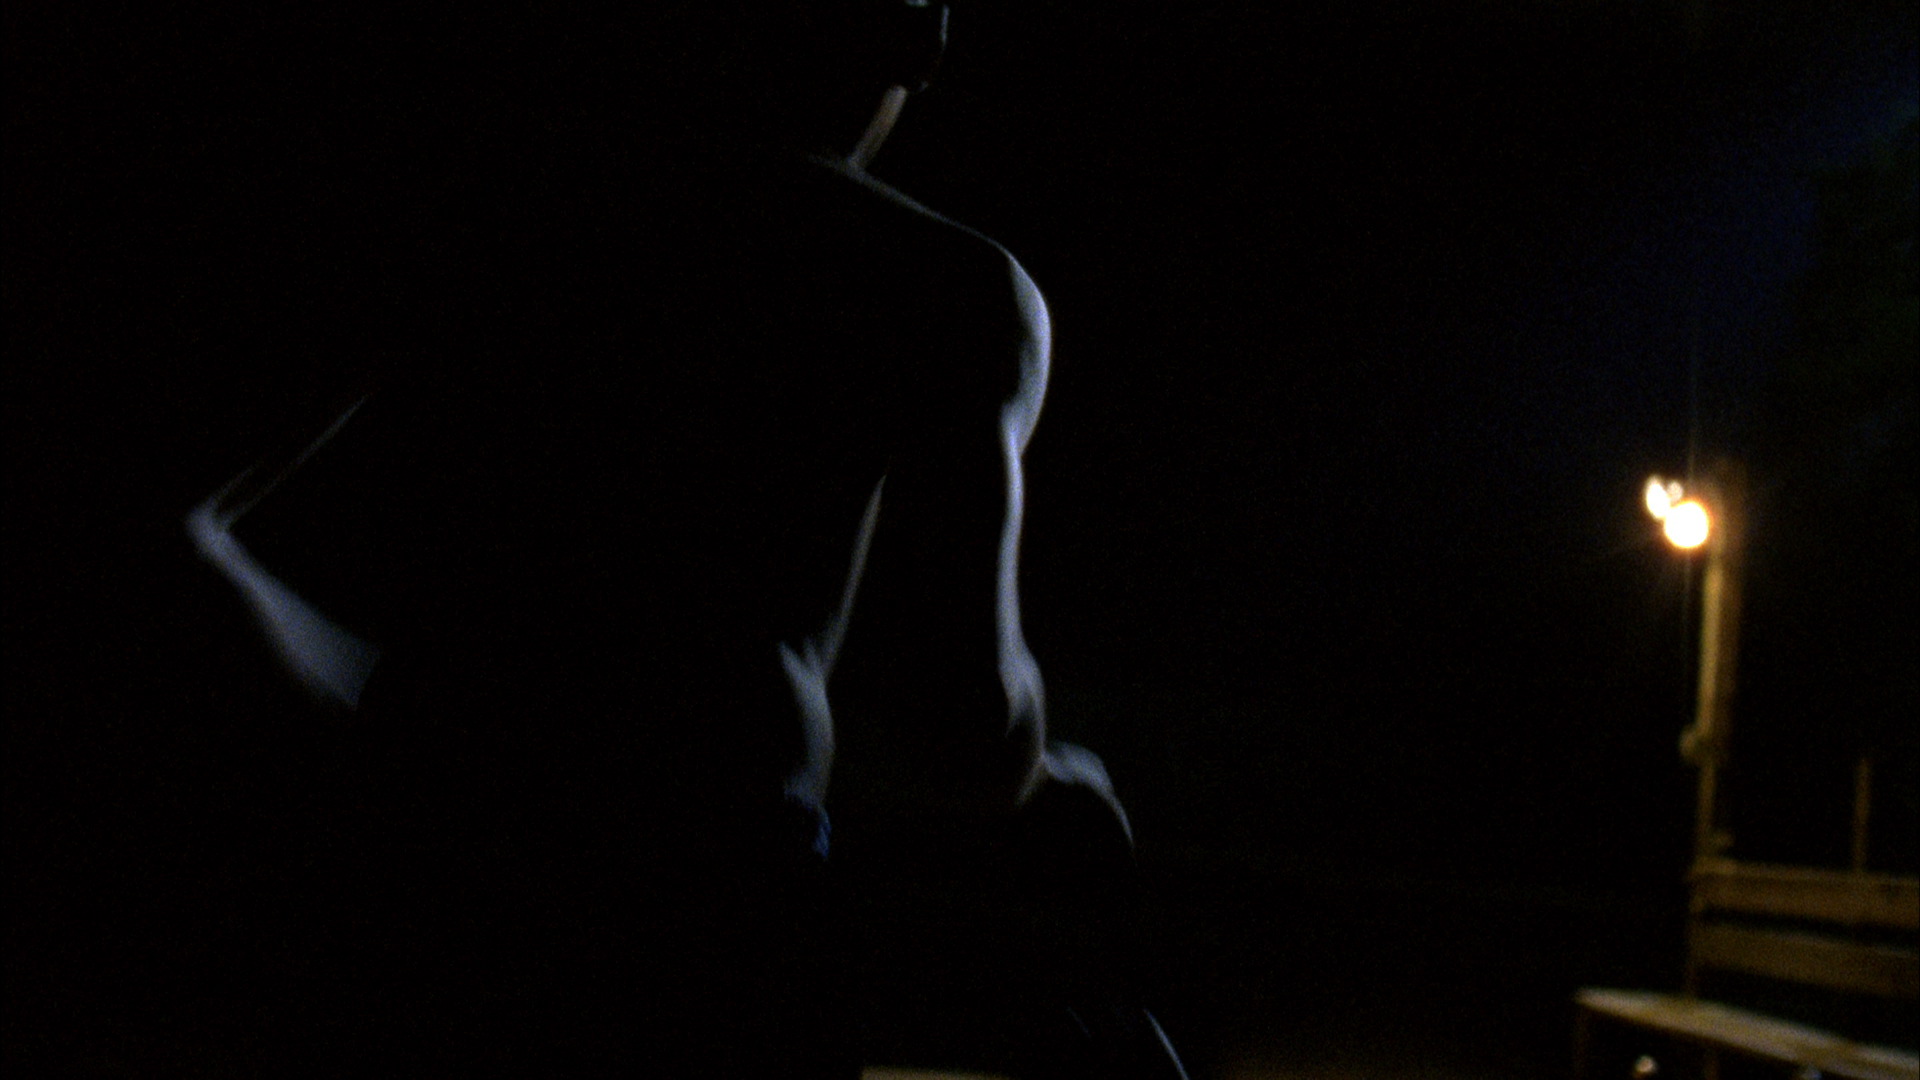
“Moon” as Back Light
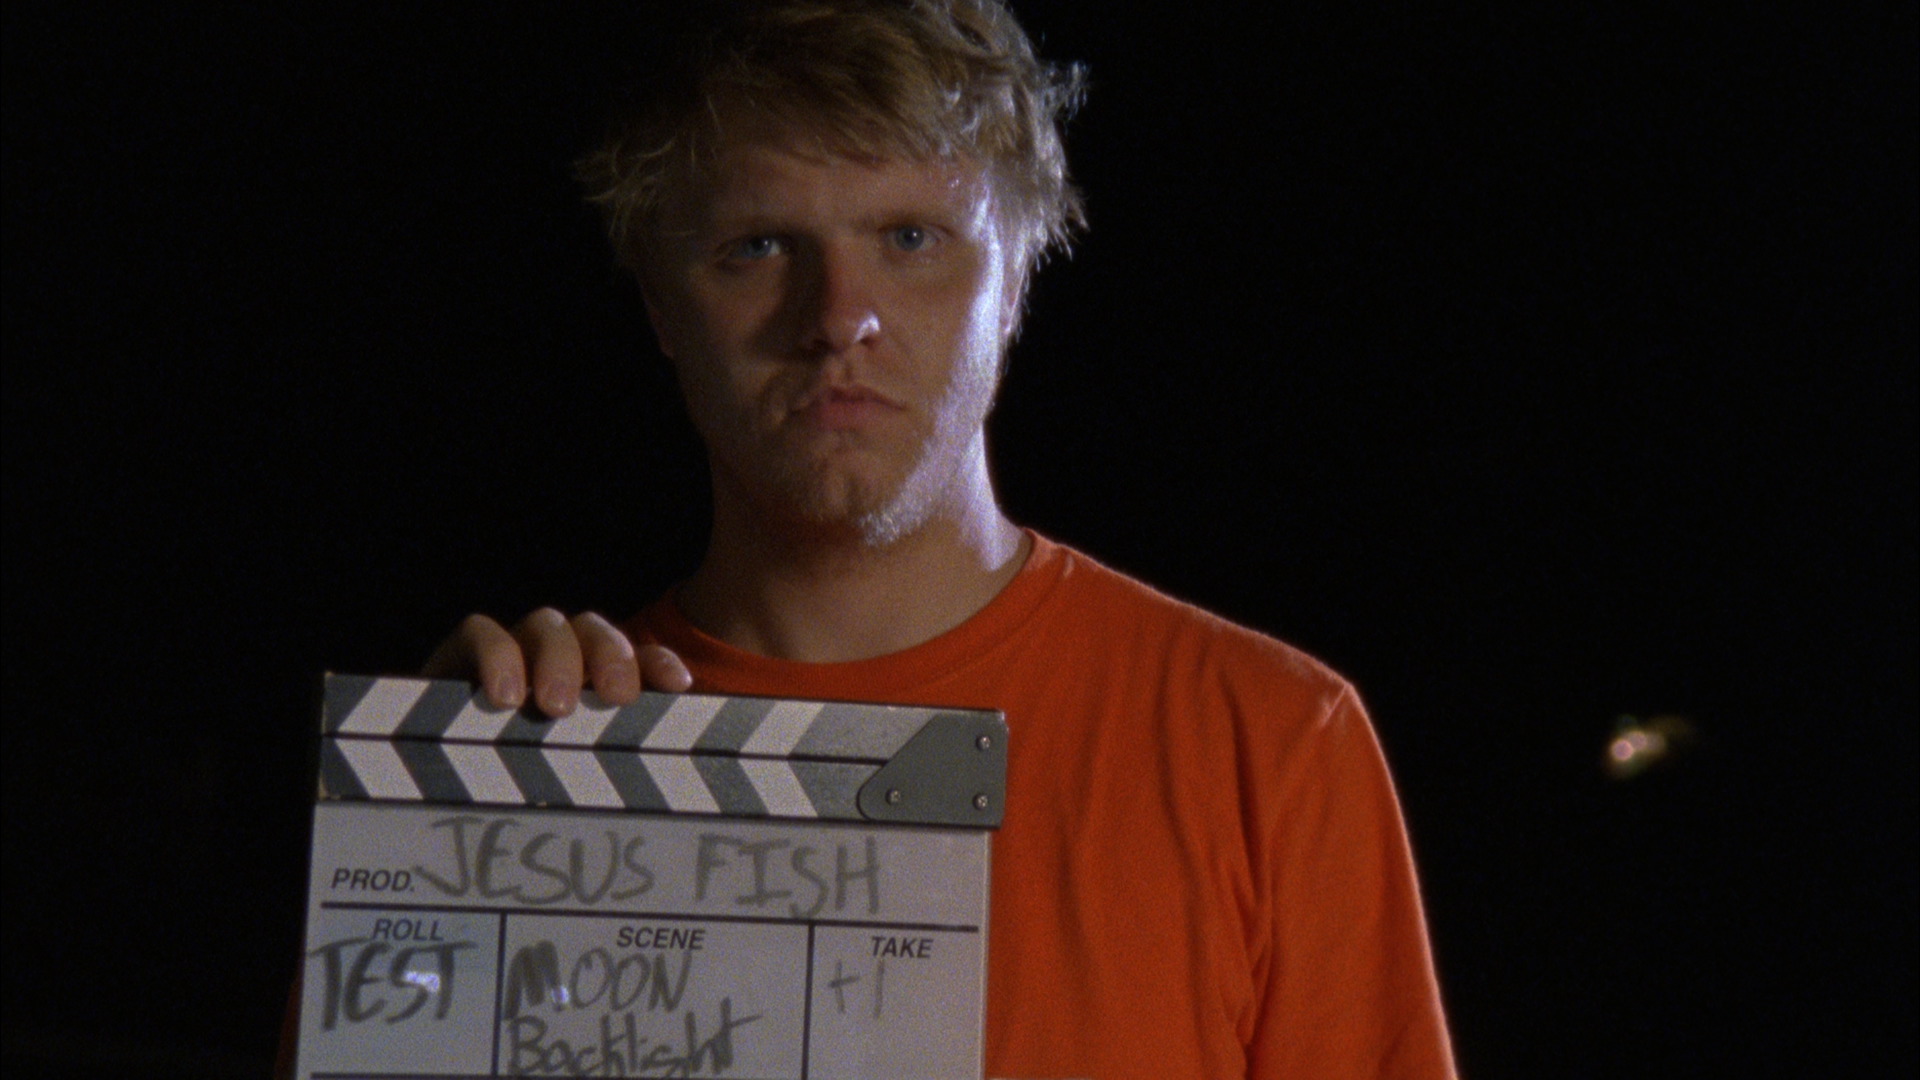
Moonlight 1-stop over, tungsten fill at exposure.
Moonlight 1-stop over, no fill.
Moonlight at exposure, tungsten fill at exposure.
Moonlight at exposure, no fill.
Moonlight 1-stop under, tungsten fill at exposure.

Moonlight 1-stop under, no fill.
Moonlight 2-stops under, tungsten fill at exposure.
Moonlight 2-stops under, no fill.
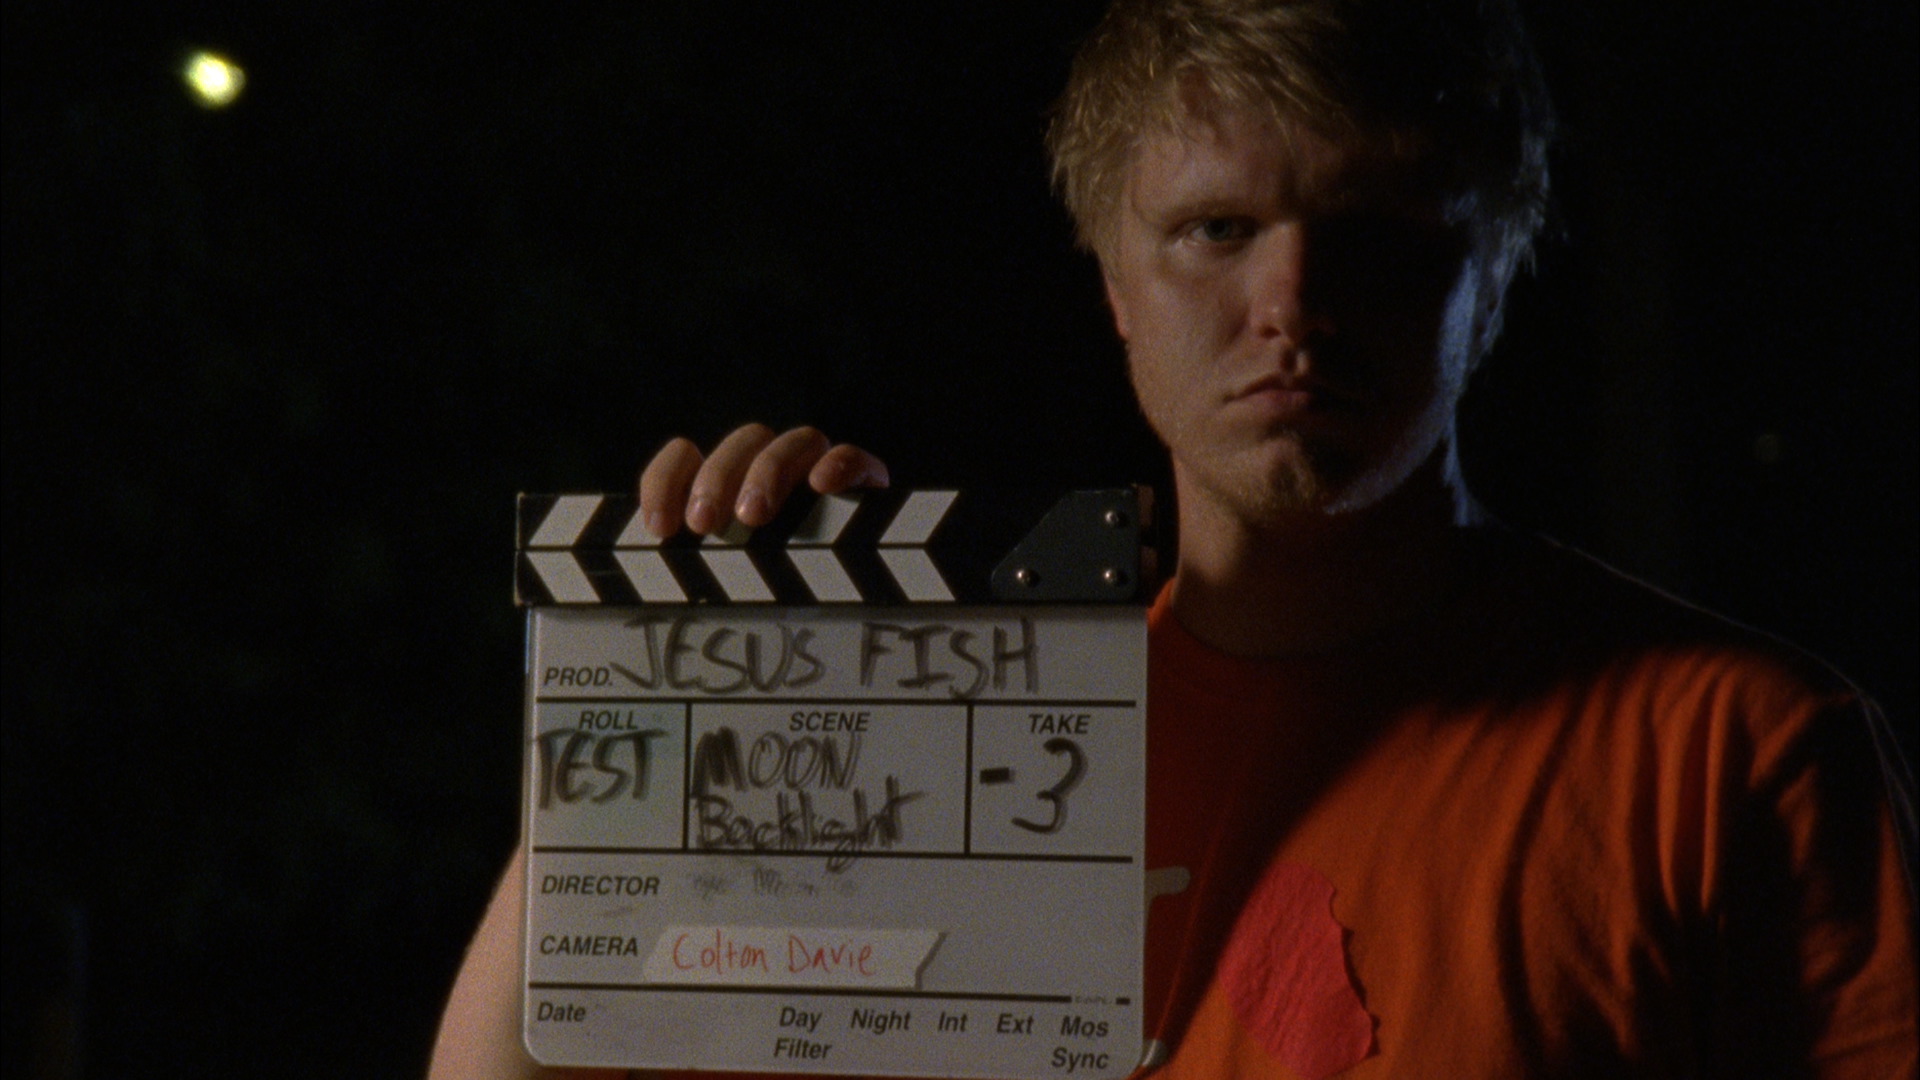
Moonlight 3-stops under, tungsten fill at exposure.

Moonlight 3-stops under, no fill.
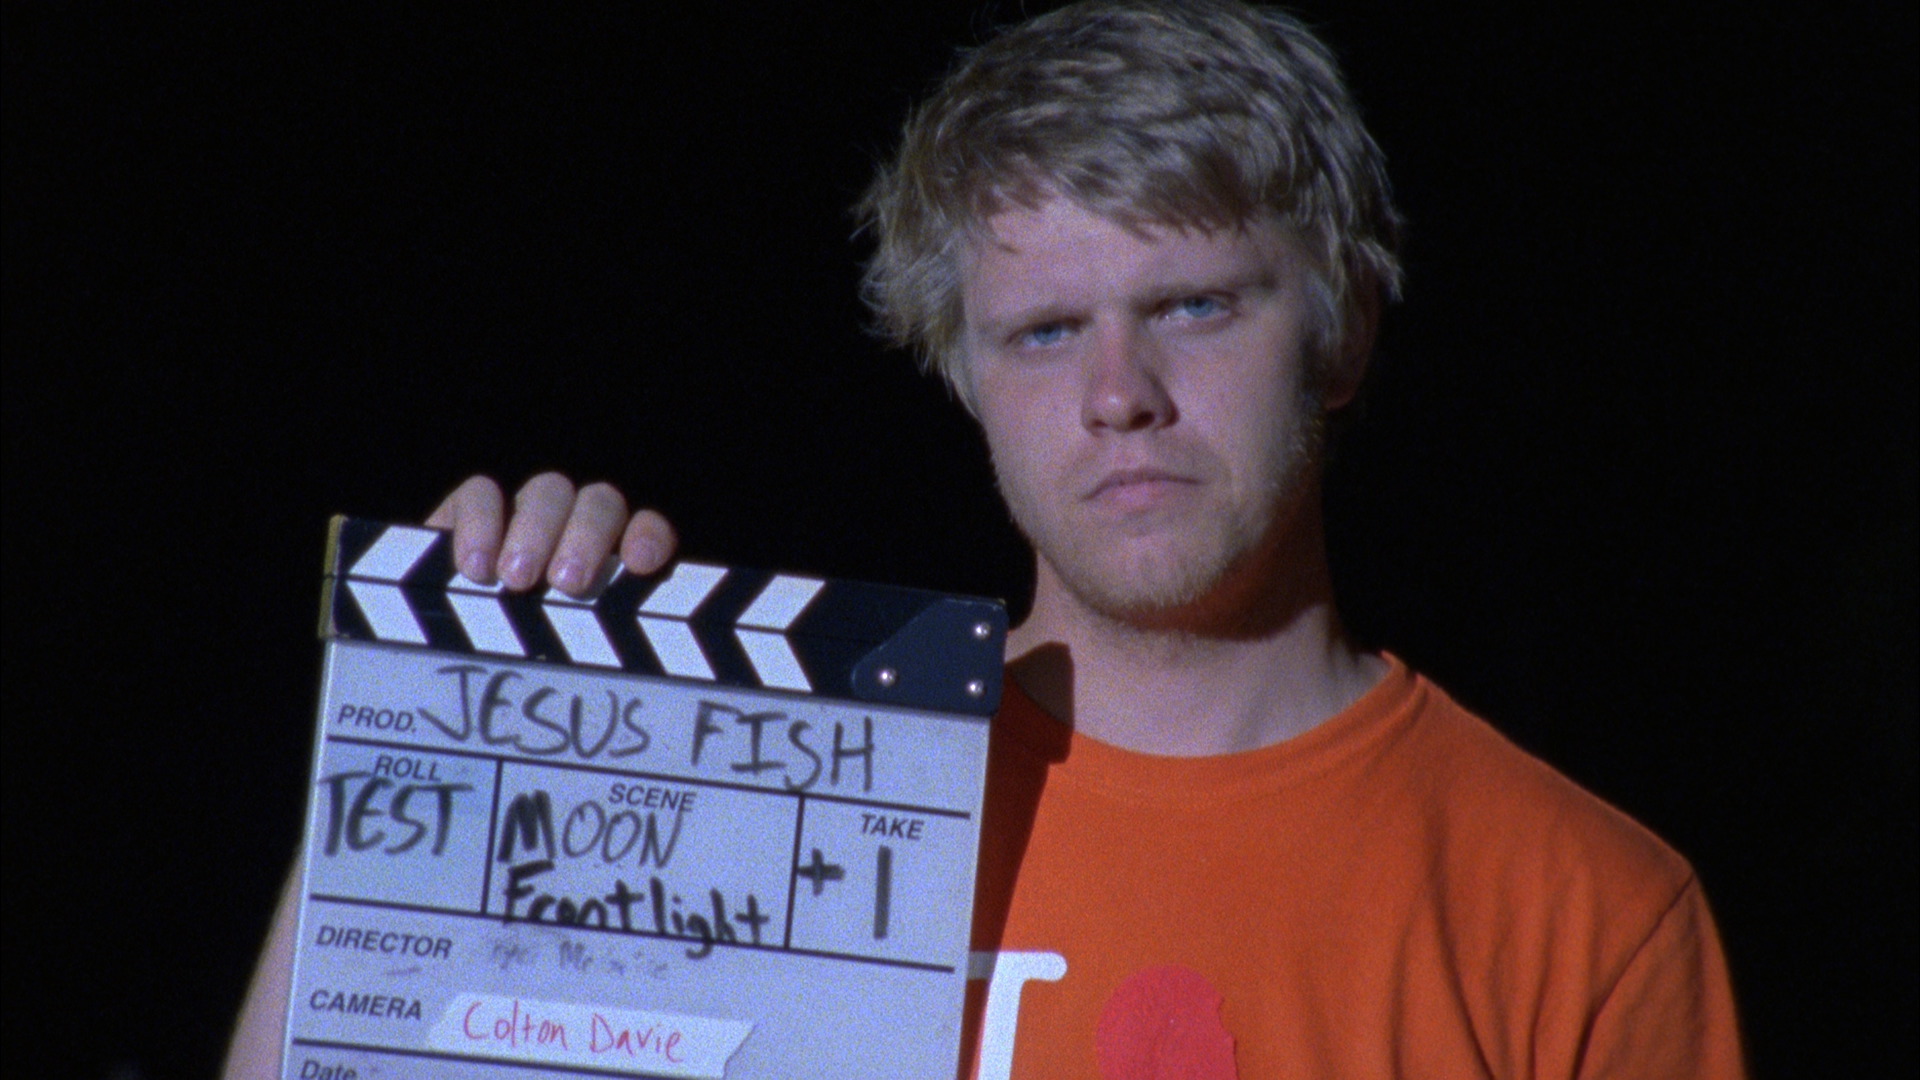
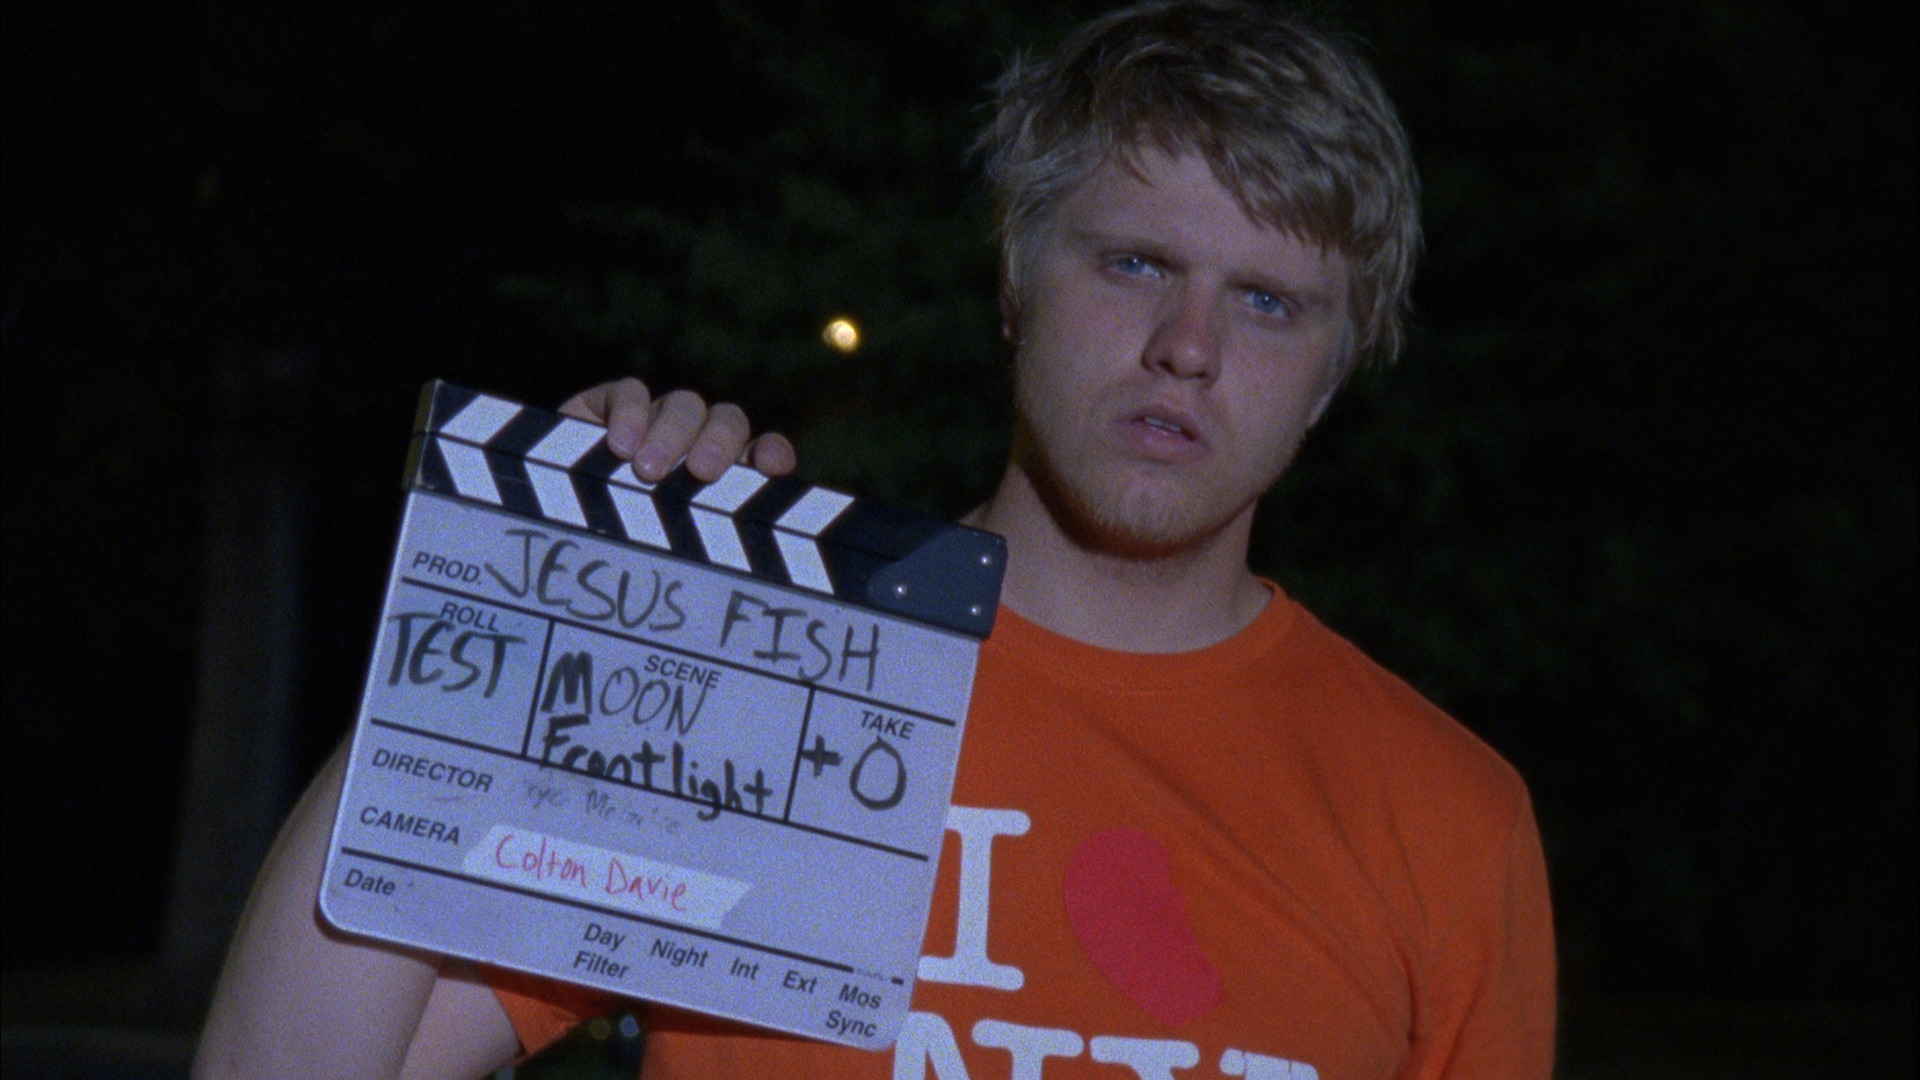
“Moon” as Front Light
Moonlight 1-stop over, no fill.
Moonlight at exposure, no fill.
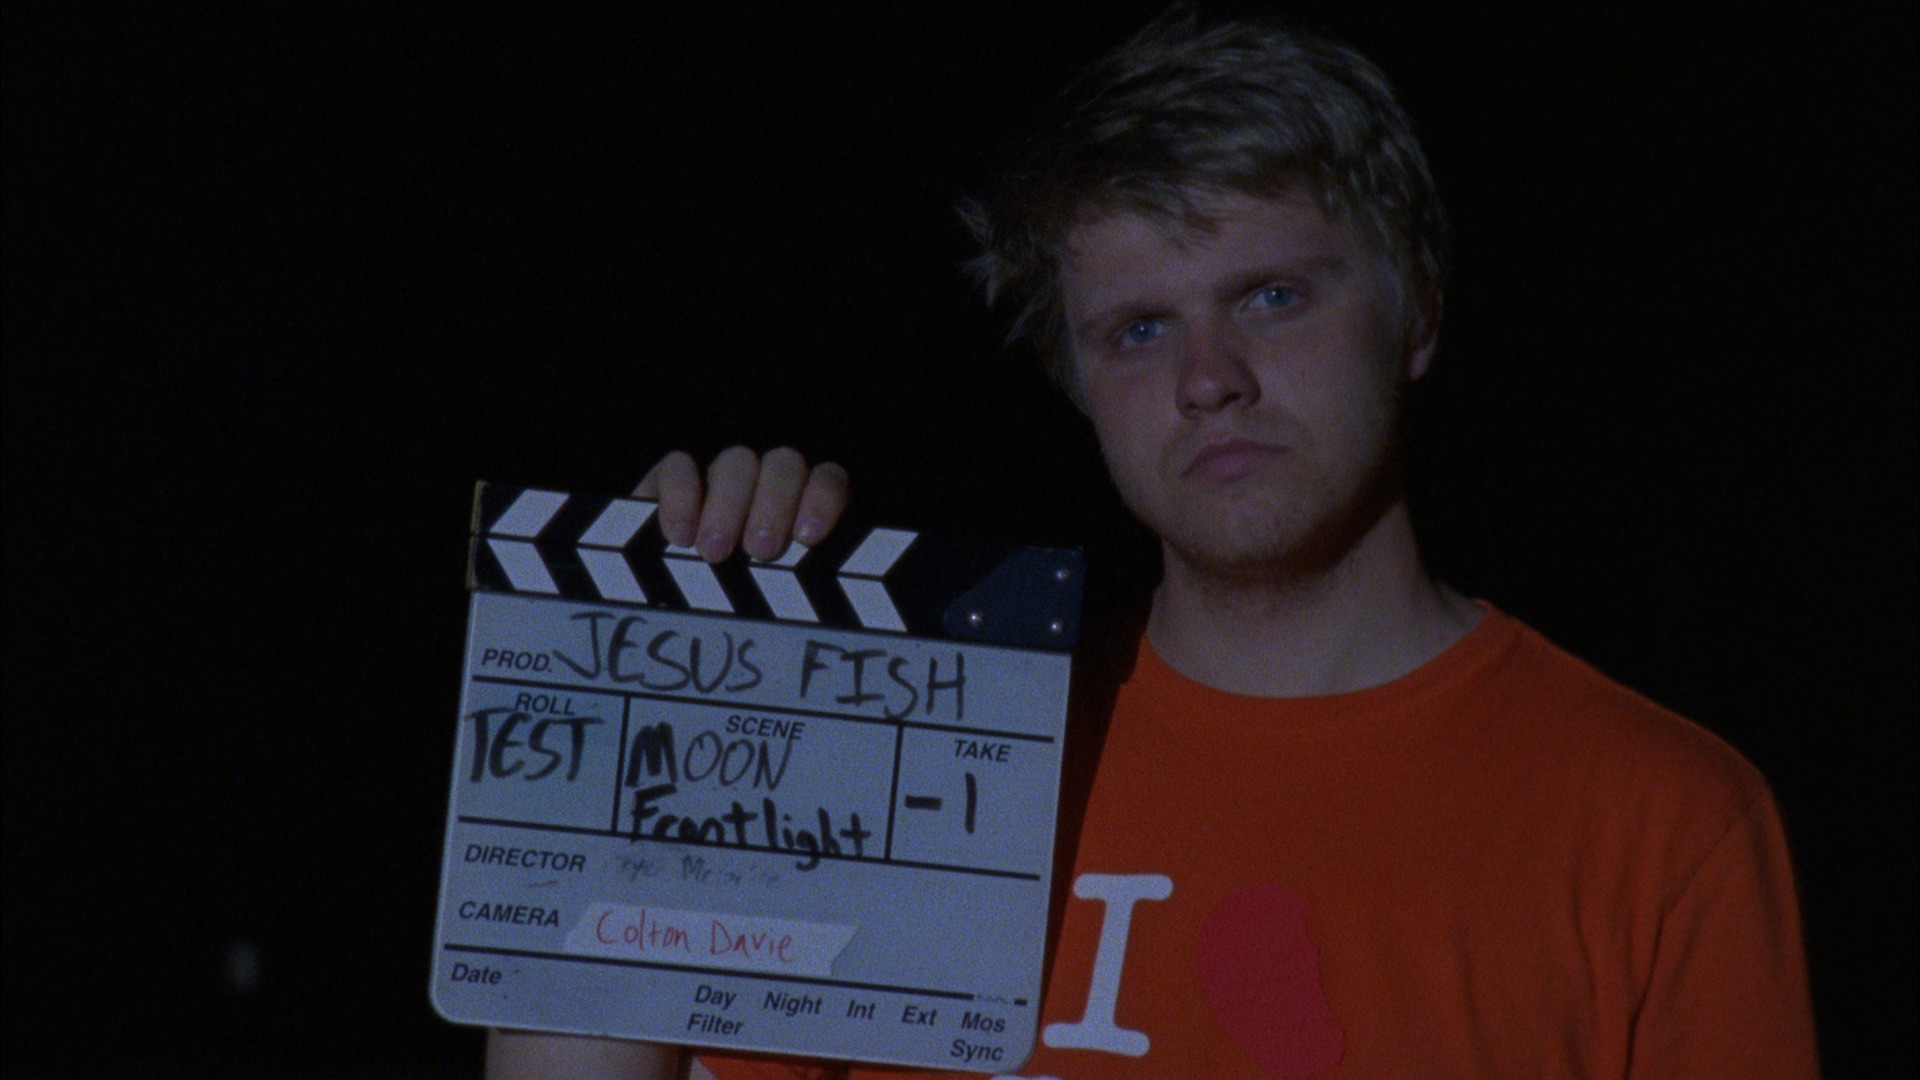
Moonlight 1-stop under, no fill.

Moonlight 2-stops under, no fill.
Moonlight 3-stops under, no fill.
The Conclusions
One of our big influences for the lighting of Jesus Fish was Roger Deakins’, ASC, BSC, work on No Country for Old Men. Director Bryce McGuire and I particularly liked the look of the pre-dawn chase scene near the beginning of the film.
Based on what we were going for and the results of this test, I decided that the moonlight effect looked best around 1 1/2 to 2 stops under exposure. I felt like this provided enough illumination to see details without looking too fake. Once I knew how bright I wanted the light to be, I could determine what size fixture was needed to achieve that brightness on location.
The Application
Before the shoot, I tech scouted the location with best boy Glenn Stegall, and Michael Easparam of Department Blue who was providing our G&E package. We measured the length of the dock, which ran over 100 feet into a cove in the Tennessee River. Either side of the cove was banked by hills with some trees. One hill had a small road running along the edge up to the end of the cove where it connected with the main river. We decided this would be a perfect place to put a condor, from which we could arm lights out into the opening of the cove, and shine them back in along the dock. Ideally, I was hoping to get an even T1.4 reading from the light along most of the dock at 500ASA with a 180° shutter.
Based on our measurements and where we planned to place the lights, I used Arri’s Photometric Calculator to find out what fixtures could give us the effect we wanted. According to the calculator, I only needed about 5 foot-candles to get my target exposure of T1.4. To be safe, I tried to err on the side of a little more light than necessary, knowing I could always scrim down if needed.
After playing around with the calculator, I decided to order a 4K PAR and a 1.8K Arri M18 for the scene. The plan was to shine the 4K deep into the cove, to illuminate the areas farthest from the light, and point the M18 down more on the end of the dock and the water. Both lights would also scrape the trees along either side of the cove.
An 80 foot lift was the biggest condor we could find in the Chattanooga area, where the shoot took place. As we began rigging for the shoot, we found that the condor couldn’t quite get out past the trees far enough to allow the 4K to be angled all the way back into the cove. We also found that the M18 was even punchier than expected. With just the M18 and considering the placement restrictions imposed by the trees, we were able to light all of the water that we needed, about half the length of the dock, and a significant portion of the trees on either side. Because the M18 was accomplishing so much on its own, we swung the 4K around to hit the opposite side of the river. I liked being able to see some detail across the river, but was afraid of it look too fake, so we scrimmed the 4K down a bit. I think we may have scrimmed it a bit too far as the far side of the river got rather buried in the shadows on the film. Live and learn, I guess.
To even out the exposure along the dock, and not let the end closest to the light be way brighter than the rest, we finessed the placement of some half half scrims in the lamp. We may have also put some 1/8 or 1/4 CTO on the light to keep it from being too blue.
For wide shots at the end of the dock we made use of the existing floodlights and let them play in frame. For close ups or shots where the lights are out of frame we added a pepper and a 2×3′ frame of diffusion, probably 250.
Here are some stills from the film:

And here is the complete film where you can see it all in motion:
In addition to the lighting on the end of the dock, I had gaffer Josh Bermudez set up some 2K fresnels on the land at the point of the cove to illuminate some detail in the deep background when the camera pointed back toward the shore. These were placed high and gelled with sodium vapor gels to give the feeling of streetlights, and contrast with the blue moonlight.
Night exteriors are often a challenge, and proper planning and preparation are important to ensuring good results. Without shooting tests and carefully scouting the location, we could have easily ended up in a situation where money was wasted on the wrong lights, or where we were unable to get the look that we needed. While things can always be improved, I can say that with the help of the crew and the time spent preparing, we created something that fits the look of the film, tells the story effectively, and that I’m proud to have shot.
Once again I’d like to thank my amazing lighting crew for making Jesus Fish happen: Josh Burmudez (gaffer), Glenn Stegal (best boy/dolly grip), Michael Easparam (condor operator), Bryan Boling (G&E swing/boat grip), Brandon McGuire (G&E swing), and Rhyan Simmons (G&E swing). You guys are awesome and I can’t wait to work with you again!
You can learn more about the short film Jesus Fish at the official website. Also, you can download the stills shown in this article for your own comparisons here.
Teamwork makes dreams work,
Colton Davie, Cinematographer
Submit a Comment