
Tests
Shooting Through Pantyhose
On 09, Aug 2014 | 6 Comments | In Tests | By Colton Davie
I recently had the pleasure of working with the Alecies, Alex Le Bas and Alex Brisker, on their new short film My Friend Jenkins. We wanted to bring a classy “Hollywood” feel to the film and looked a lot at Janusz Kaminski’s work with Steven Spielberg, as well as Joe Wright’s Atonement, shot by Seamus McGarvey, ASC, BSC, as references.
One staple of Kaminski’s work is his expressive use of lens diffusion. His use of net diffusion, such as in Minority Report and others, lends a particularly unique texture to the image. McGarvey also used nets behind the lens for the scenes of Briony’s childhood in Atonement, giving a romantic softness to the images.
When shooting digital, I am always interested in ways to add texture to, or otherwise dirty up what can sometimes be a too pristine image, and director Alex Le Bas really liked the idea of getting soft, bloomy highlights. It seemed like some sort of net diffusion could be an excellent tool in achieving our specific look.
“Net diffusion” is simply the practice of placing a thin, net-like fabric, often stockings or pantyhose, in front of or behind the lens. The fabric causes some of the light traveling through the lens to bend, while allowing the rest to travel straight through. The result is an out of focus image laid over a sharp image, which is the basic result of practically all forms of lens diffusion. Of course, different types of fabrics produce different results. So, before committing to a certain material, I wanted to test out several different options to see how the looks varied, and make an informed decision on which look was most appropriate for our specific project.
When discussing stockings in regards to cinematography, two types that frequently get brought up are Christian Dior 10-Denier black stockings and black Fogal Noblesse #110. These are often used because there are very sheer with very fine threads. As you can see in my tests below, the effect can get strong quite fast, so in order to not overwhelm the image, the finer the fabric the better in most cases. These specific types of stockings can be rather tricky to track down. I didn’t want to order some online and risk not having time to test, so I decided to make a trip to my local fabric and department stores and get a few samples of the sheerest fabric I could find.
This is what I came home with:
- Big Tulle = Black tulle fabric I found at JoAnn.
- Small Tulle = Similar fabric but with tighter weave.
- AUS = Hanes Absolutely Ultra Sheer black pantyhose.
- CK7 = Calvin Klein 7-denier pantyhose, charcoal color.
- DK7 = Donna Karan The Nudes, 7-denier black pantyhose.
- DK10 = Donna Karan 10-denier black pantyhose.
The Test
(Notice how blurry the 24mm DK10 Rear shot is. This is because part of the fabric became detached from the lens, causing it to fold over on itself.)
Taking my cues from Tiffen’s 4K Diffusion Test Film, excellently shot by Stephen Murphy, I set up a scene that hopefully clearly demonstrates the differences between the fabrics. My incredibly patient wife Kelly is keyed with moderately soft light and no fill so that we can see how the diffusion affects contrast. The hot backlight allows us to see highlight blooming characteristics. And the bare soft-wite bulb, dimmed down considerably, shows how the nets react to bright hot spots.
The different nets also had marked effects on lens flare. I had a matte box and eyebrow on the camera at all times, keeping direct light out of the lens. But to see how each net flared, I slowly tilted up to the back light, allowing light to directly hit the lens:
These tests were shot at a constant exposure of about T/4. The fabrics caused varying degrees of light loss, usually about 1/3 to 2/3 of a stop. I used the gamma adjustment in Resolve to approximately match the gray card exposure of each shot to the clean version.
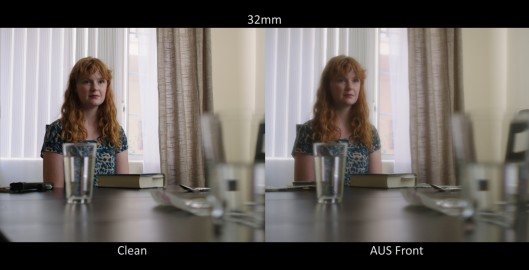
After examining these images with Alex, we narrowed down our potential candidates to the Small Tulle, AUS, and DK10. In order to get a better idea of how the nets would function on set, I shot another range of tests with these fabrics, this time in situations more like those we would encounter during the shoot. These “real world” tests aren’t quite as controlled, especially the exterior shots, but they were nevertheless very enlightening:
The Results
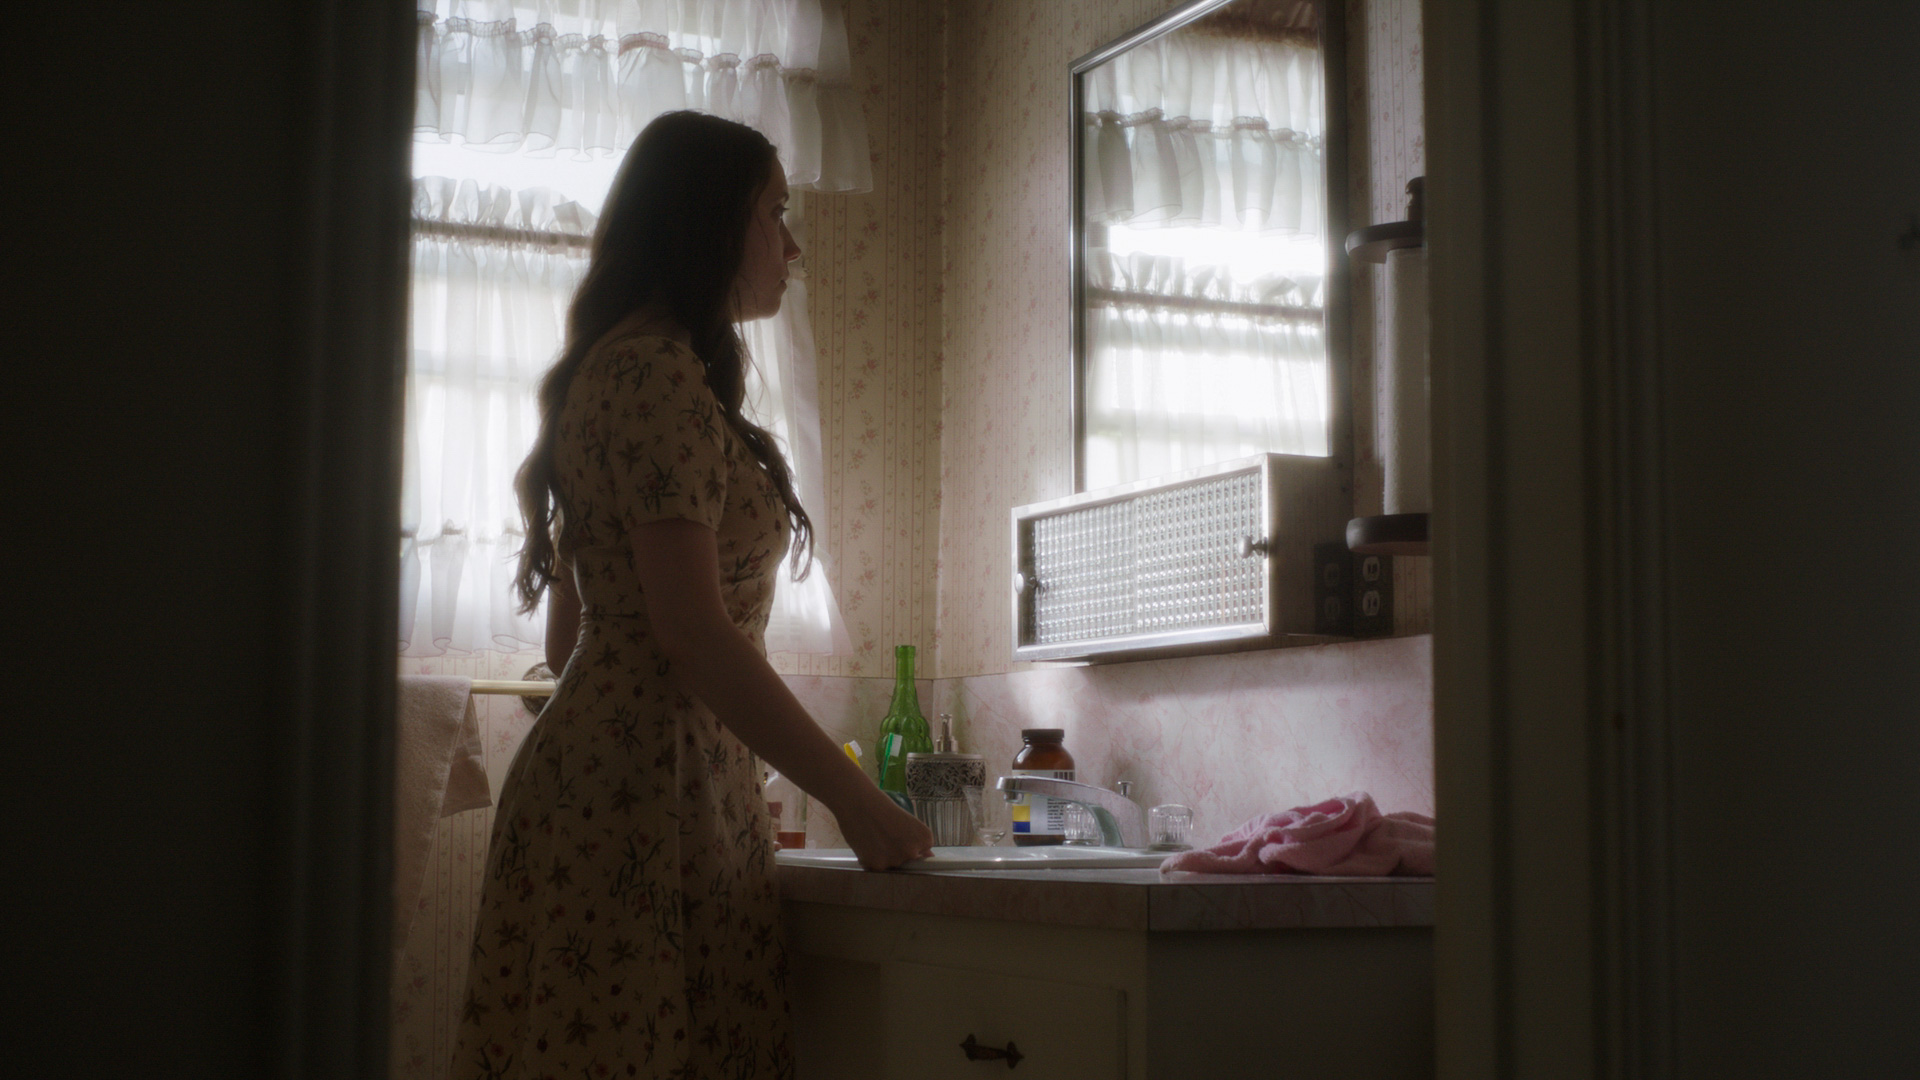
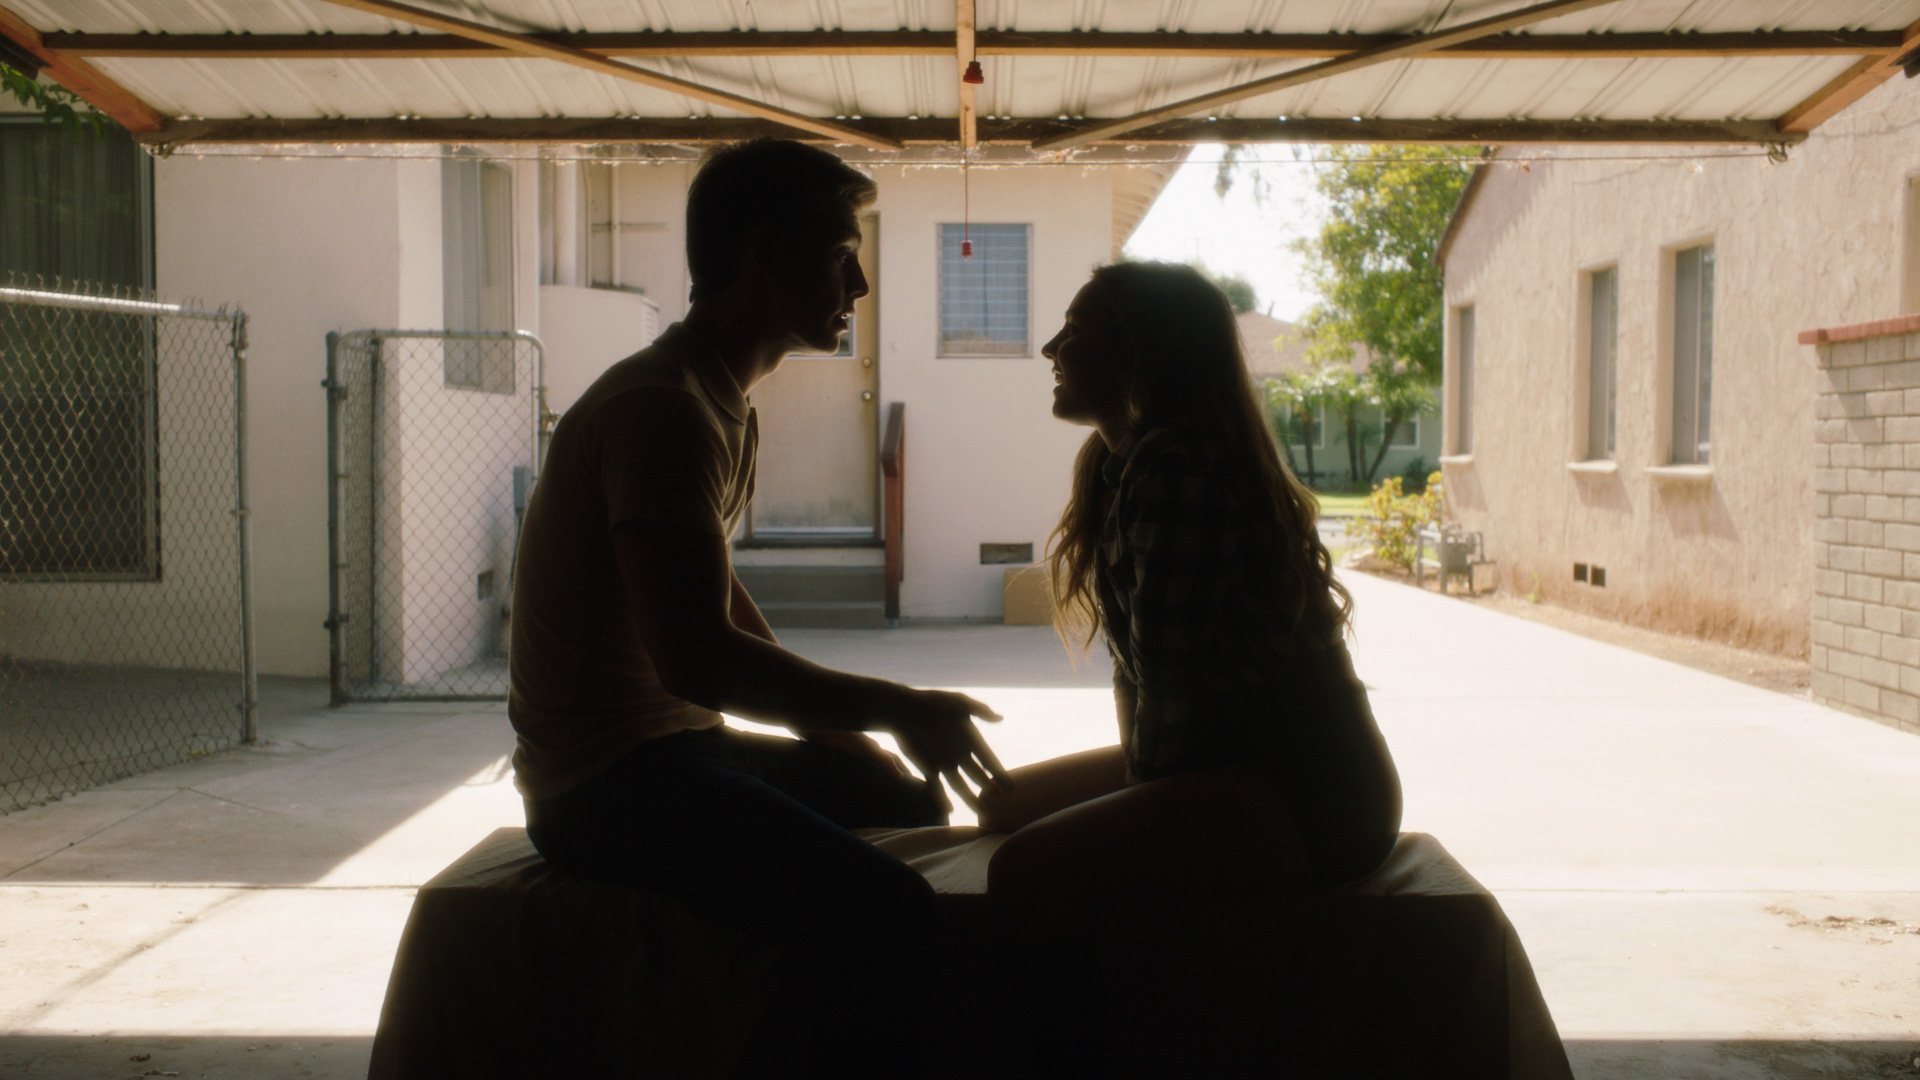
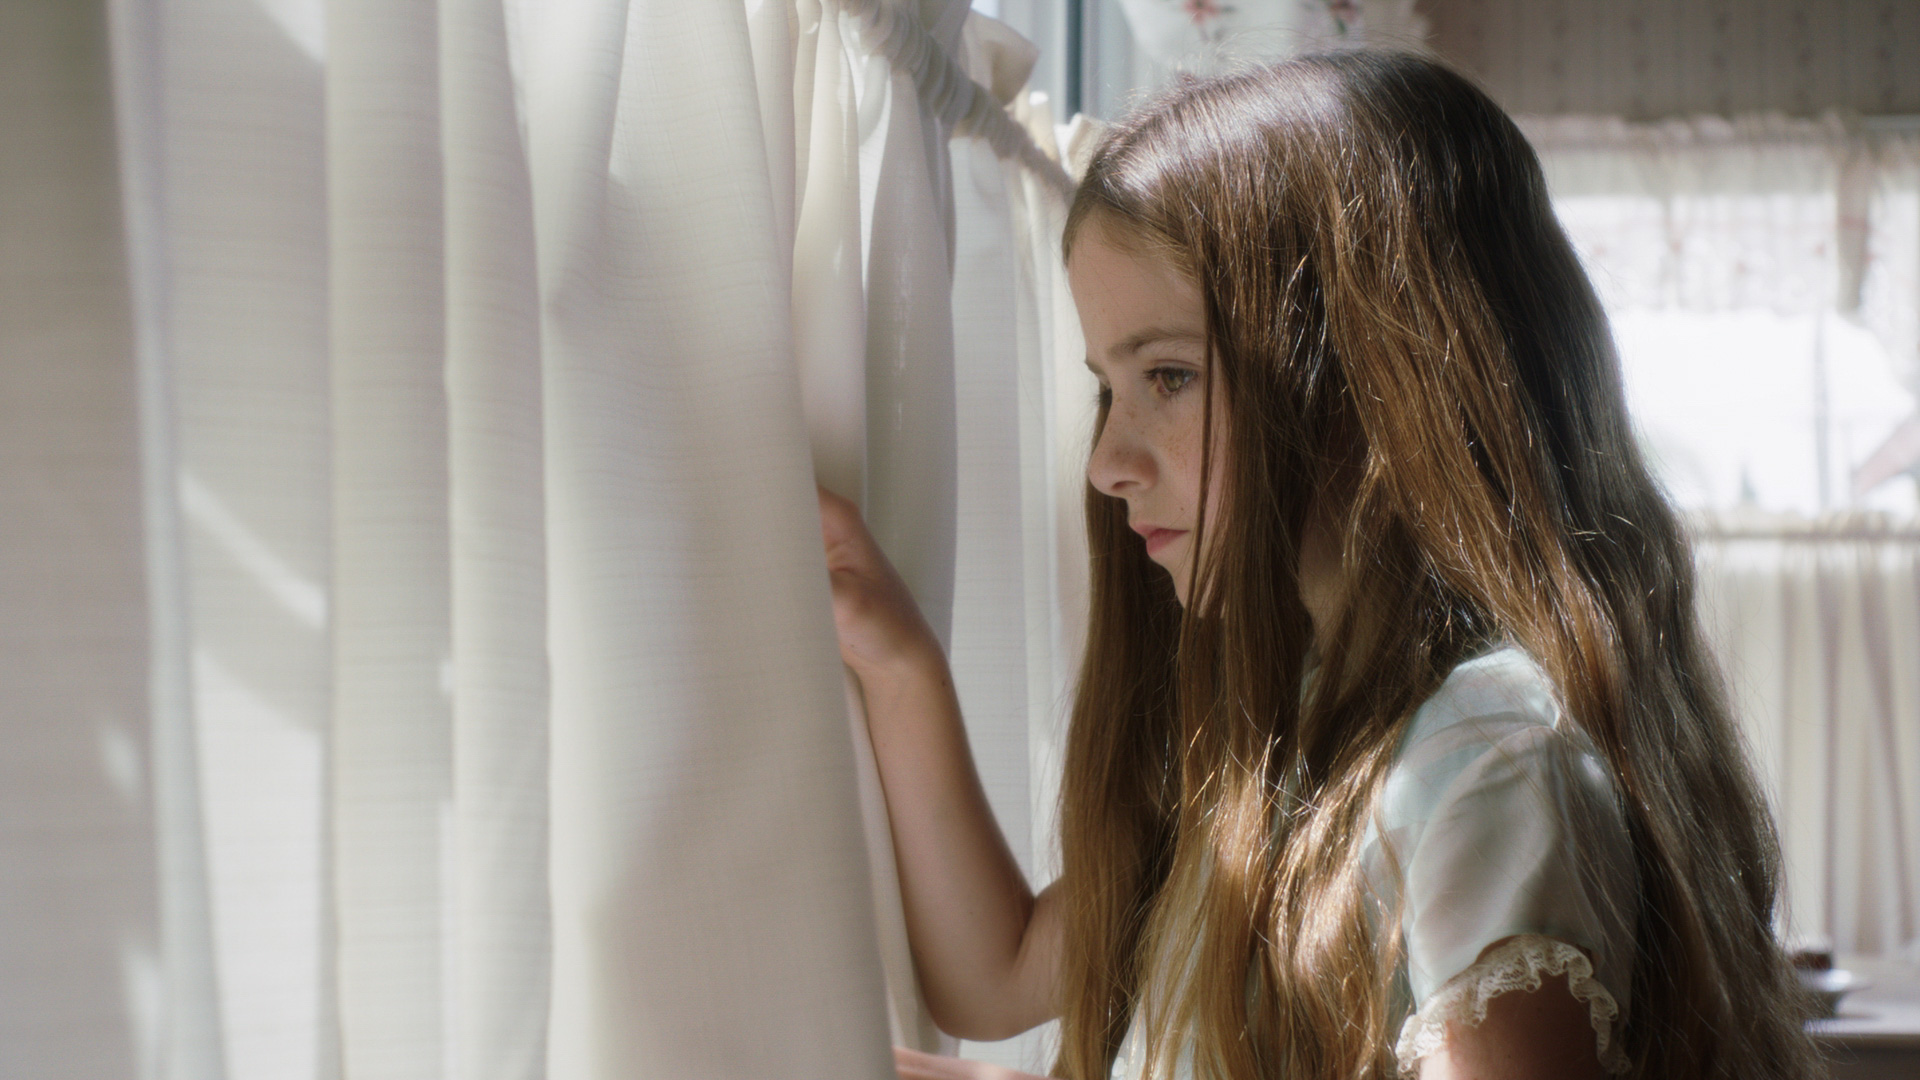
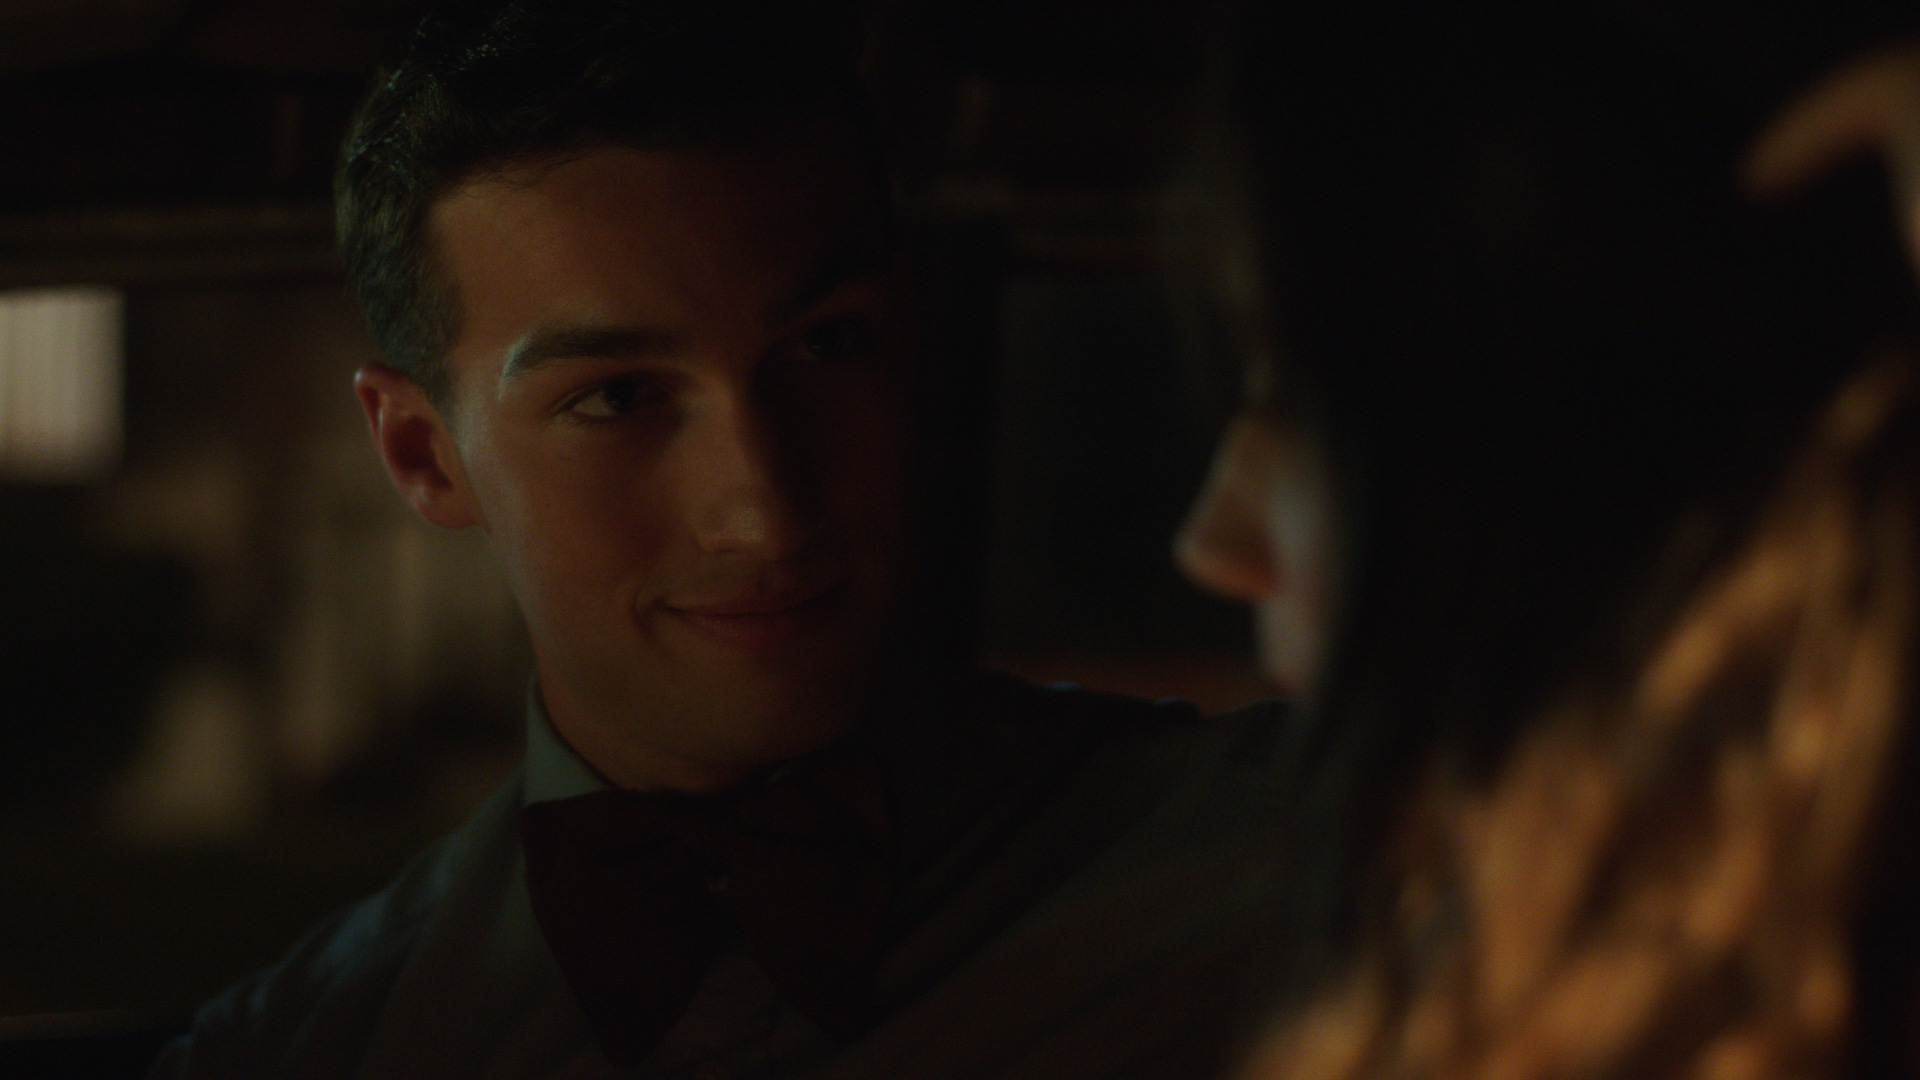
We ended up using the AUS (Hanes Absolutely Ultra Sheer) mounted to the rear of the lenses for most of the shoot, switching to the Small Tulle in front of the lens when a more subtle effect was needed. Here are some stills from the film, all with the rear-mounted AUS:
I’d love to get a hold of some classic Dior or Fogal stockings; even the lightest department store hose are a bit on the heavy side. The word is that Diors are no longer being made, but the Gennia 10-Denier RHT from Secrets in Lace are supposed to have almost the exact same effect. I actually just ordered some while writing this post. Feel free to share what you’ve used in the comments.
As for mounting the nets, Mako Koiwai has a great, simple video demonstration on how to rear-net a lens. There are various way of front-mounting nets, but I found a simple embroidery hoop to be very easy and effective. The hoop allows you to pull the net tight and even, and the 4″ ones fit into my O’Connor O-Box over my Zeiss Standard Speeds quite nicely. Obviously, different lenses may need different sized hoops.
Lens diffusion has long been an effective way for cinematographers to add their personal touch to the look of a project. Nets offer a unique and low cost alternative to the variety of glass diffusion filters available.
Give it a shot,
Colton Davie, Cinematographer
-
I actually used the Gienna 10D on a recent music video shoot, to success. I wish I’d known you wanted some…I have tons left over.
-
No, I used it behind the lens with a little AKS tape.
-
Solid work man! Love the setup – Tiffen had a good setup so it’s great you’re creating direct comparisons here.
What I’ve been trying to crack is the red rim around practical bulb halos; I’ve seen them on your reel but am not sure if they’re caused specifically by film stock rolling off the halos, or something else… Can you give me a hint? 😀
Comments